May 16 2025
Dear Partners,
Thanks for your continued support of Norming solutions. Norming Asset Management 2025 is released with a number of new features.
Below please find the details.
Part I - Highlight
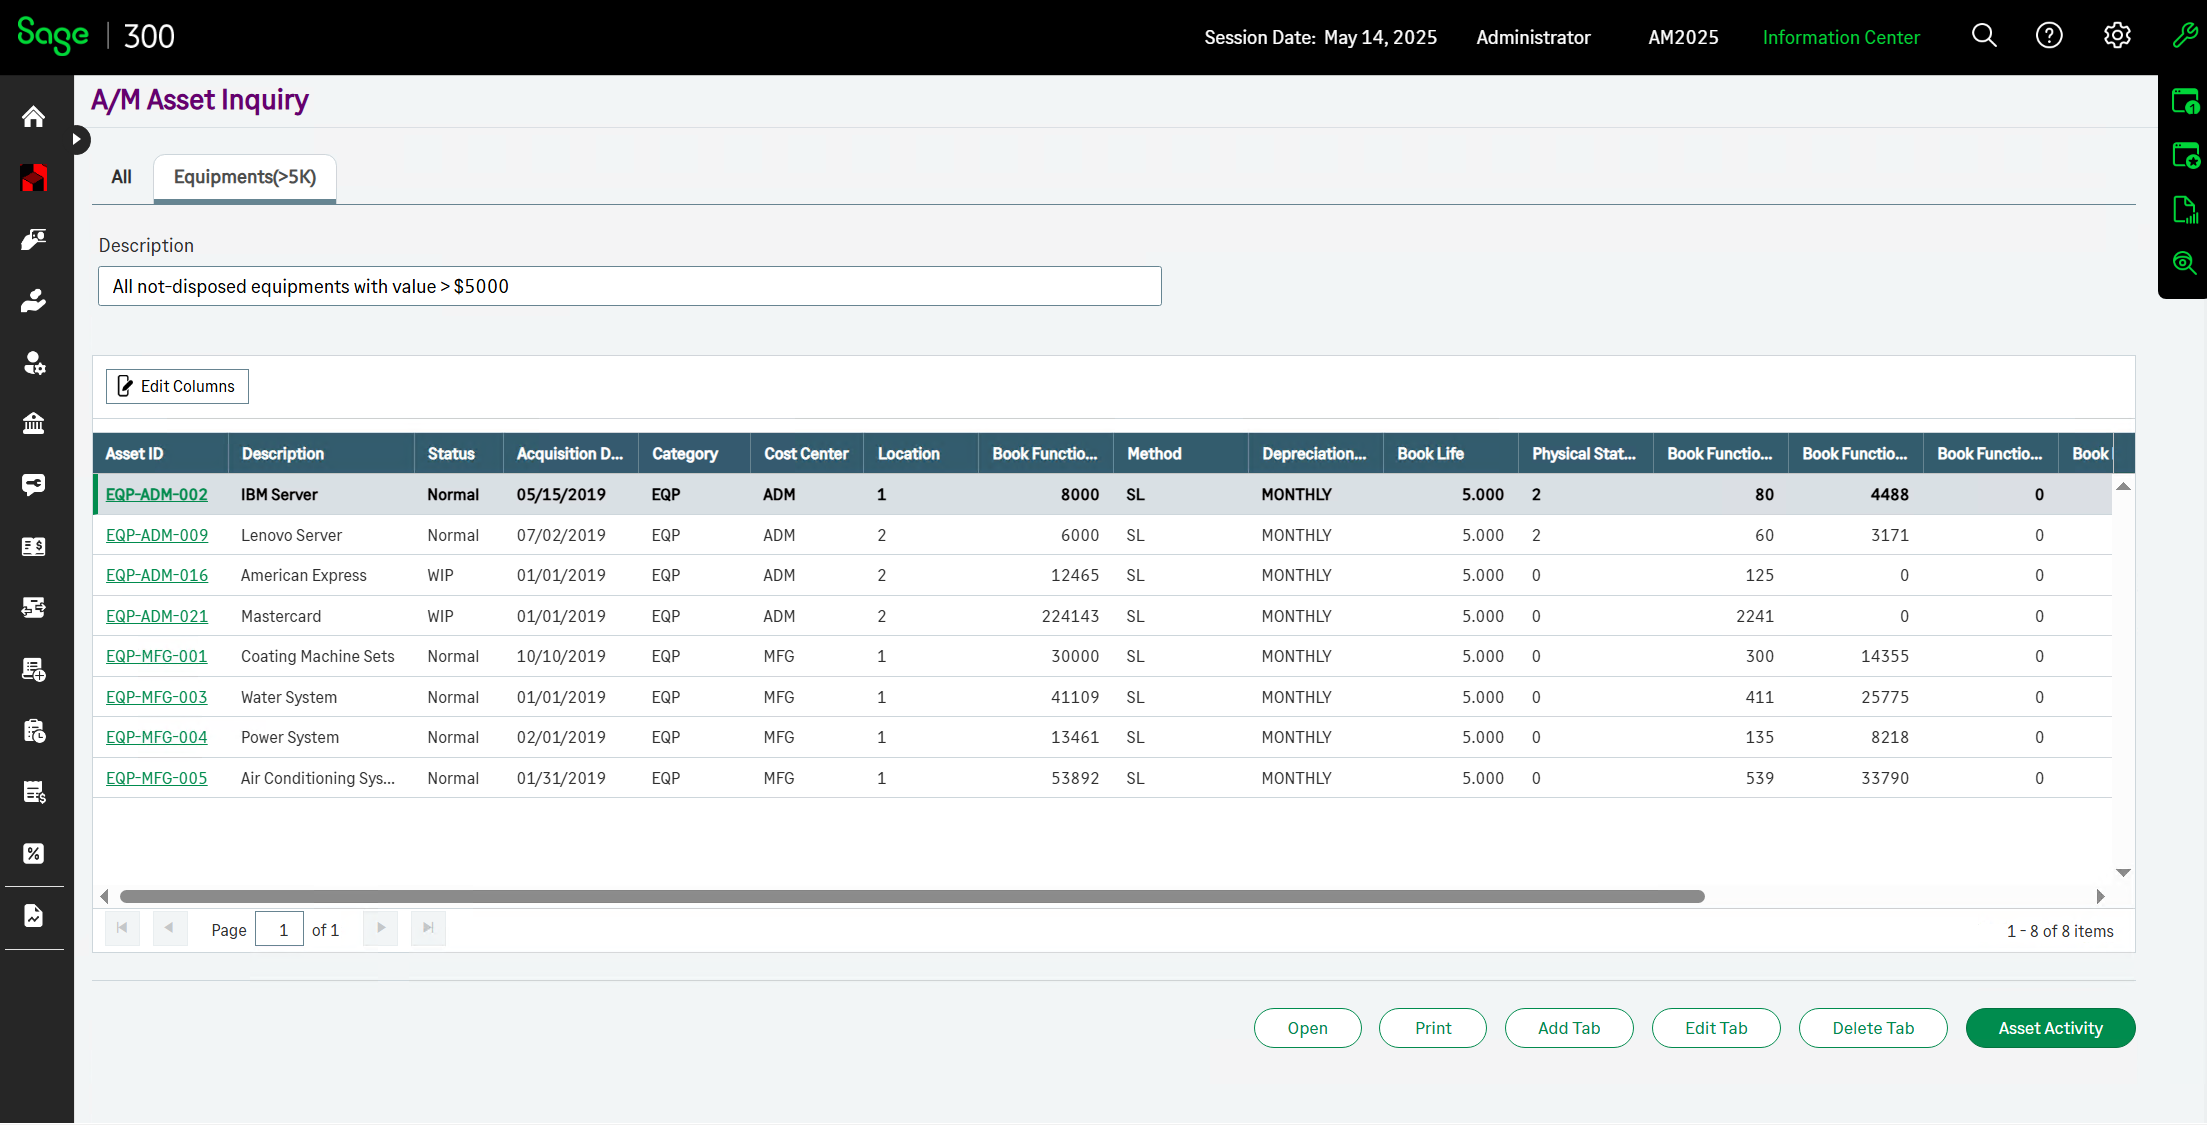
Asset Inquiry - Smarter fixed assets analysis
Easy to group and display assets with predefined-criterion in separate folders. Inquiry result can be exported for further analysis.
In this version, the following three significant improvements are made to the Asset Inquiry tool:
● The ability to create separate tabs for grouping and displaying assets with predefined-criterion.
● The ability to add/remove columns, and to change column order for the inquiry result table.
● The ability to export inquiry results to MS Excel (or CSV) file for further analysis.
How to create a new tab
Step 1 - Go to the Asset Inquiry screen.

Click the 'Add Tab' button in the above picture to open the 'Add Tab' screen.
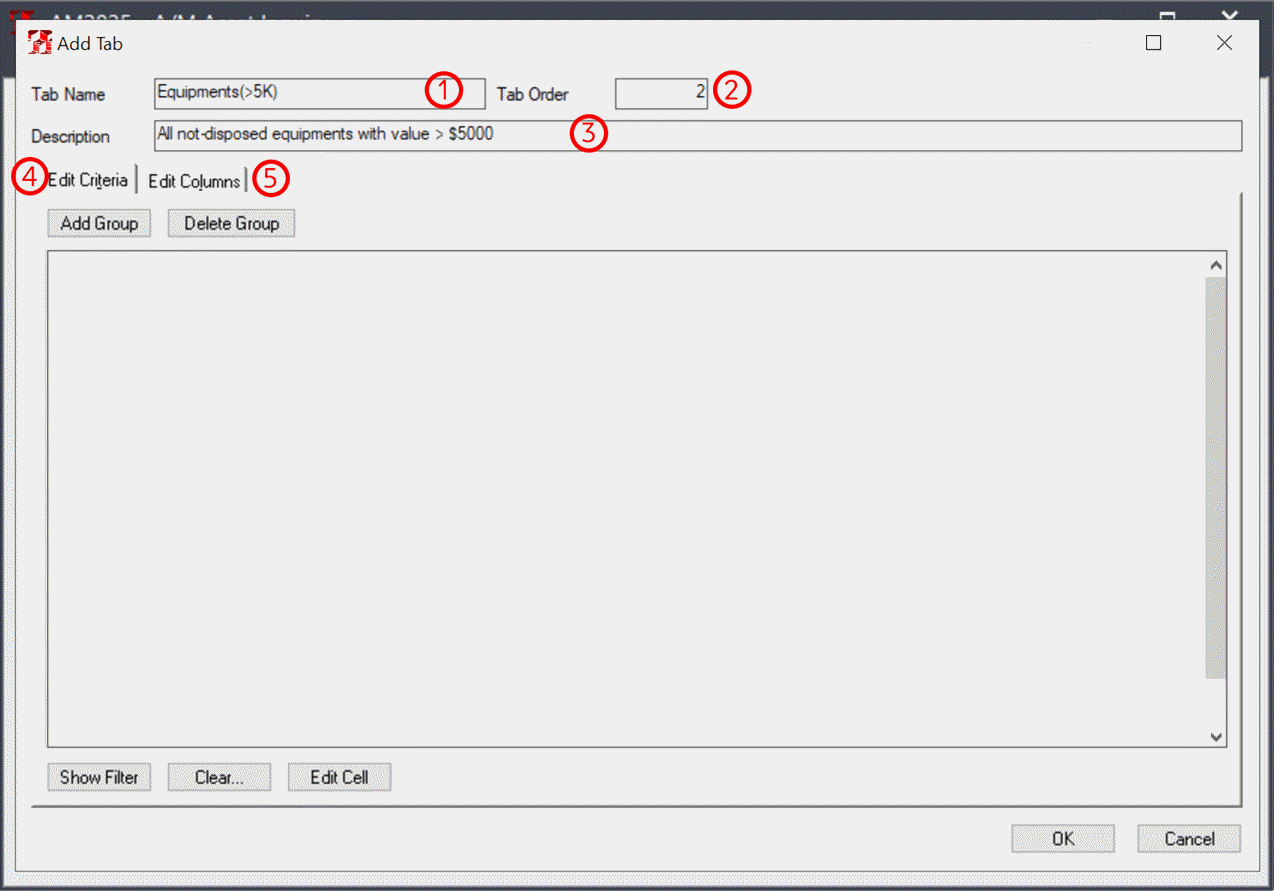
Step 2 - Define the basic information
1. Specify a name for this new tab.
2. Decide where to display this tab.
3. Enter a description for this tab if required.
4. Add filters to set criterion for the assets to display in this new tab.
5. Edit columns if required.
Step 3 - Define filters
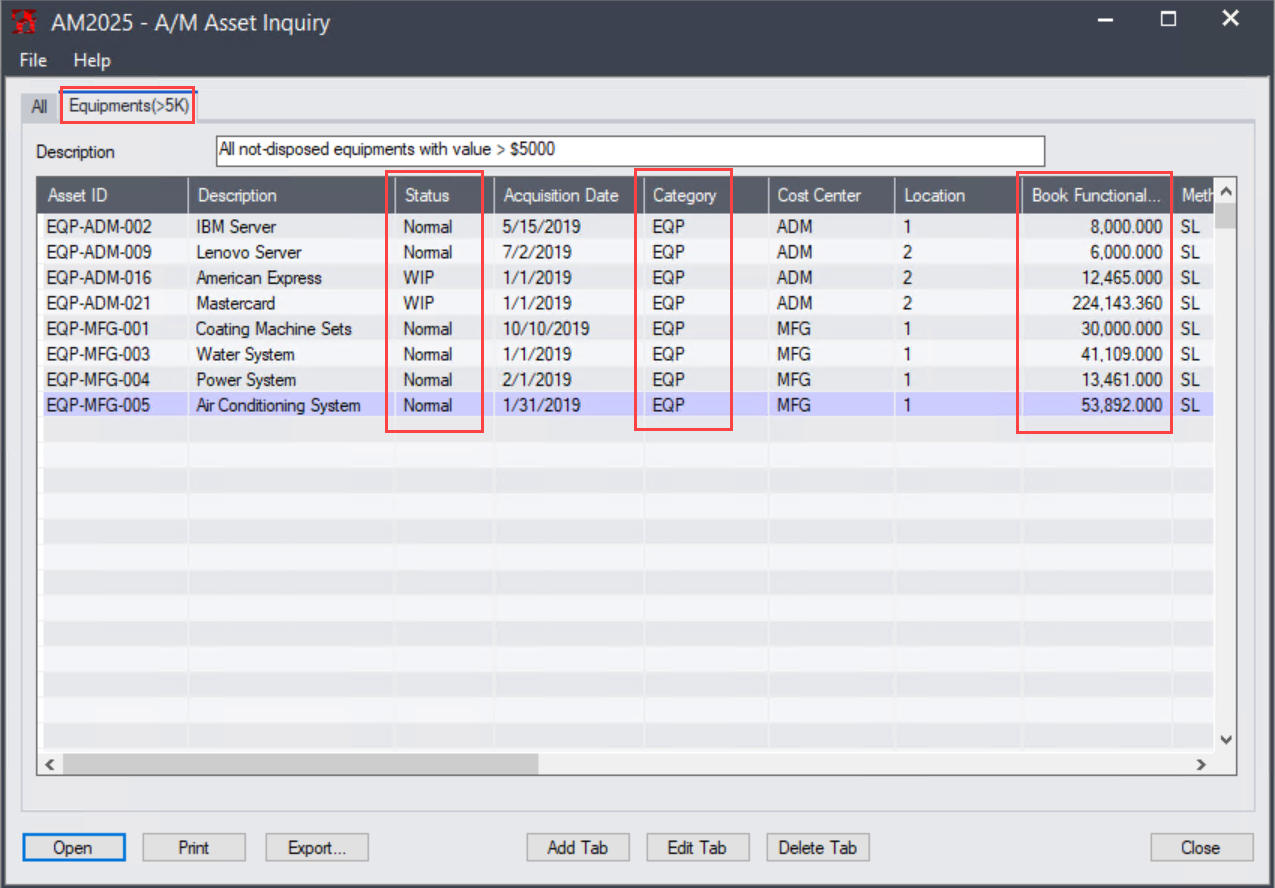
This example illustrates how to create a tab for listing all un-disposed assets with value greater than 5,000 USD and under 'Equipment' category.
Click the 'Add Group' button on the below screen to add a filter group, then click the 'Edit Cell' button or double click the cell to edit a filter.
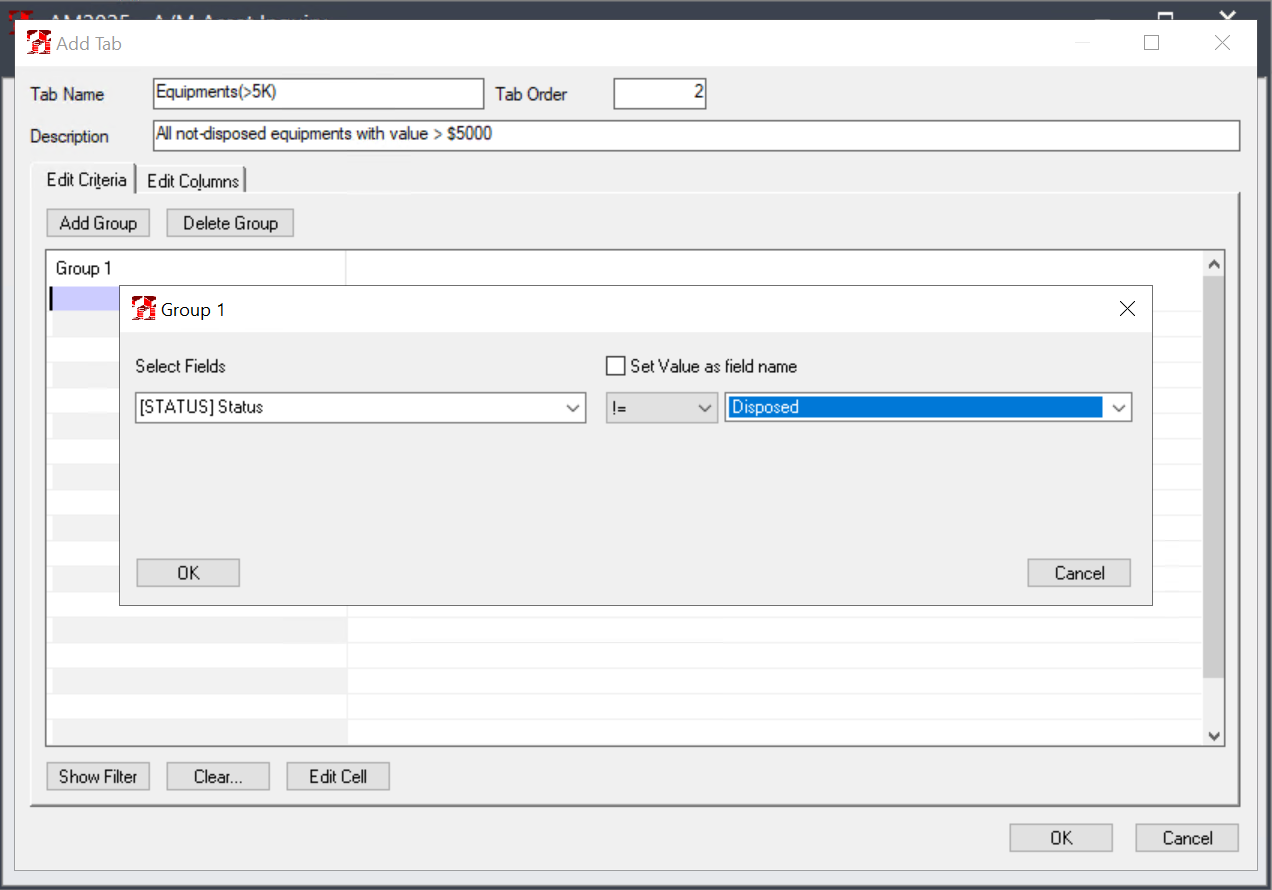
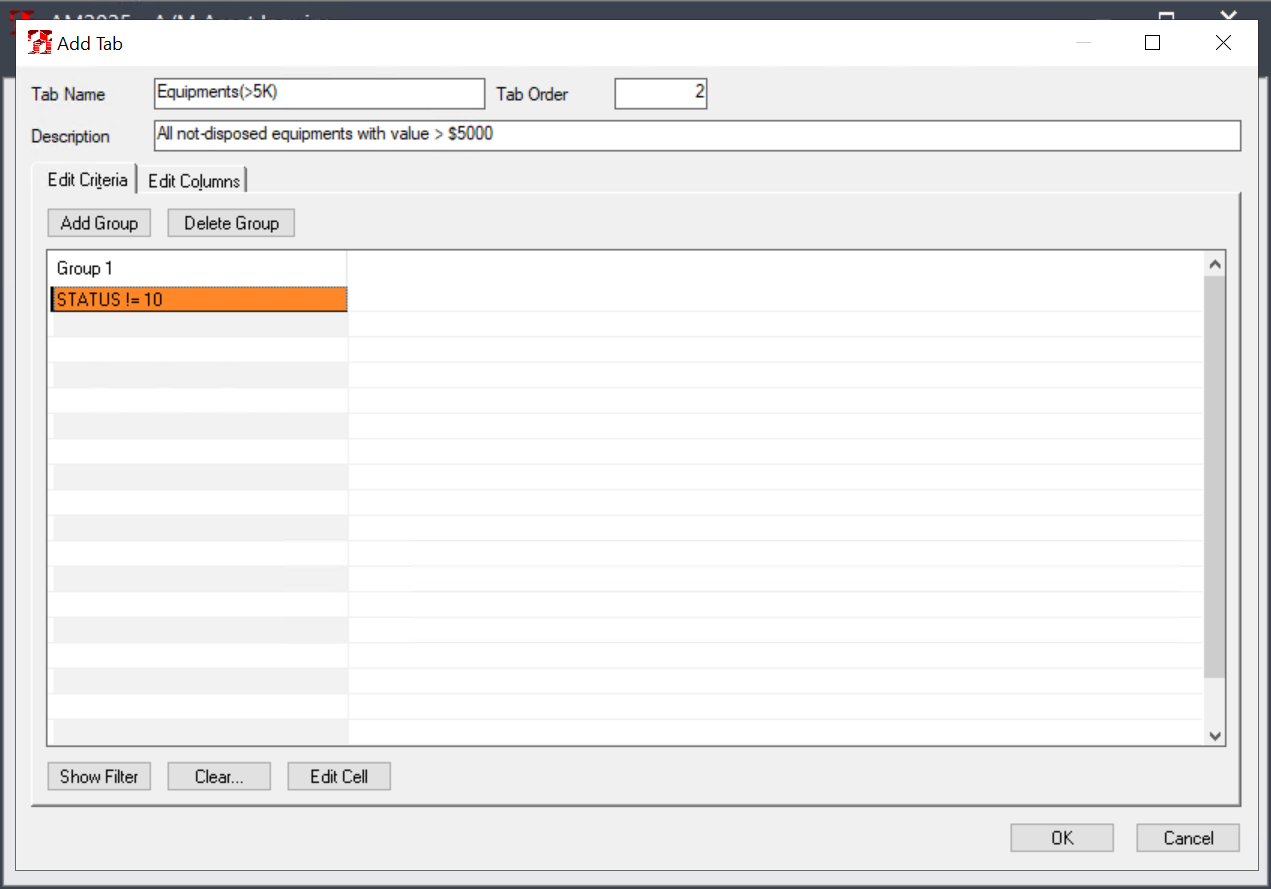
The first filter is to exclude all the disposed assets, ie. set Asset Status not equal to 'Disposed'.
Click the ‘OK’ button to accept this filter.
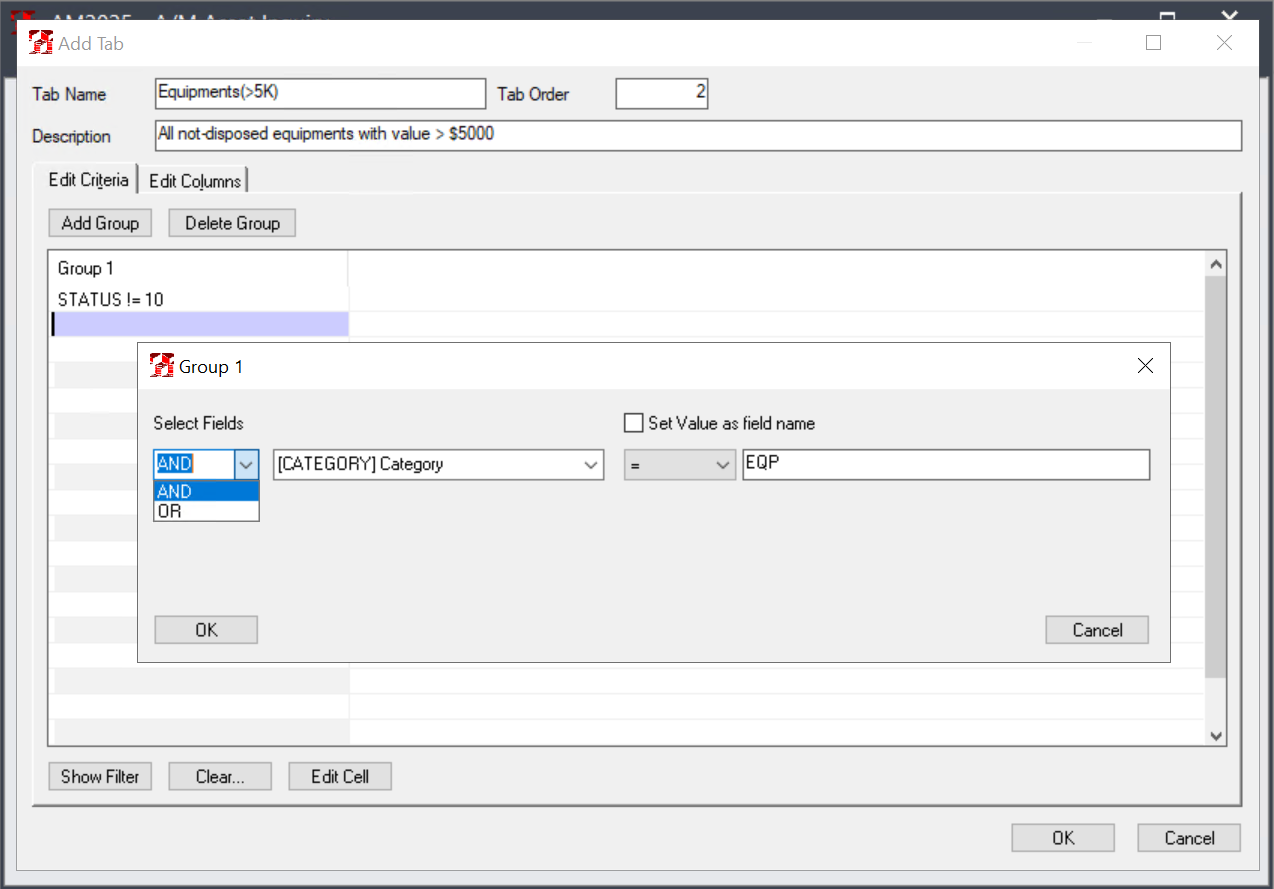
The second filter is defined to display only the assets under the ‘Equipment’ category.
You can add the second filter under the current group or add it to a new group.
Note: When creating a new filter, a relation ('And' or 'Or') for this filter with other filters must be specified.
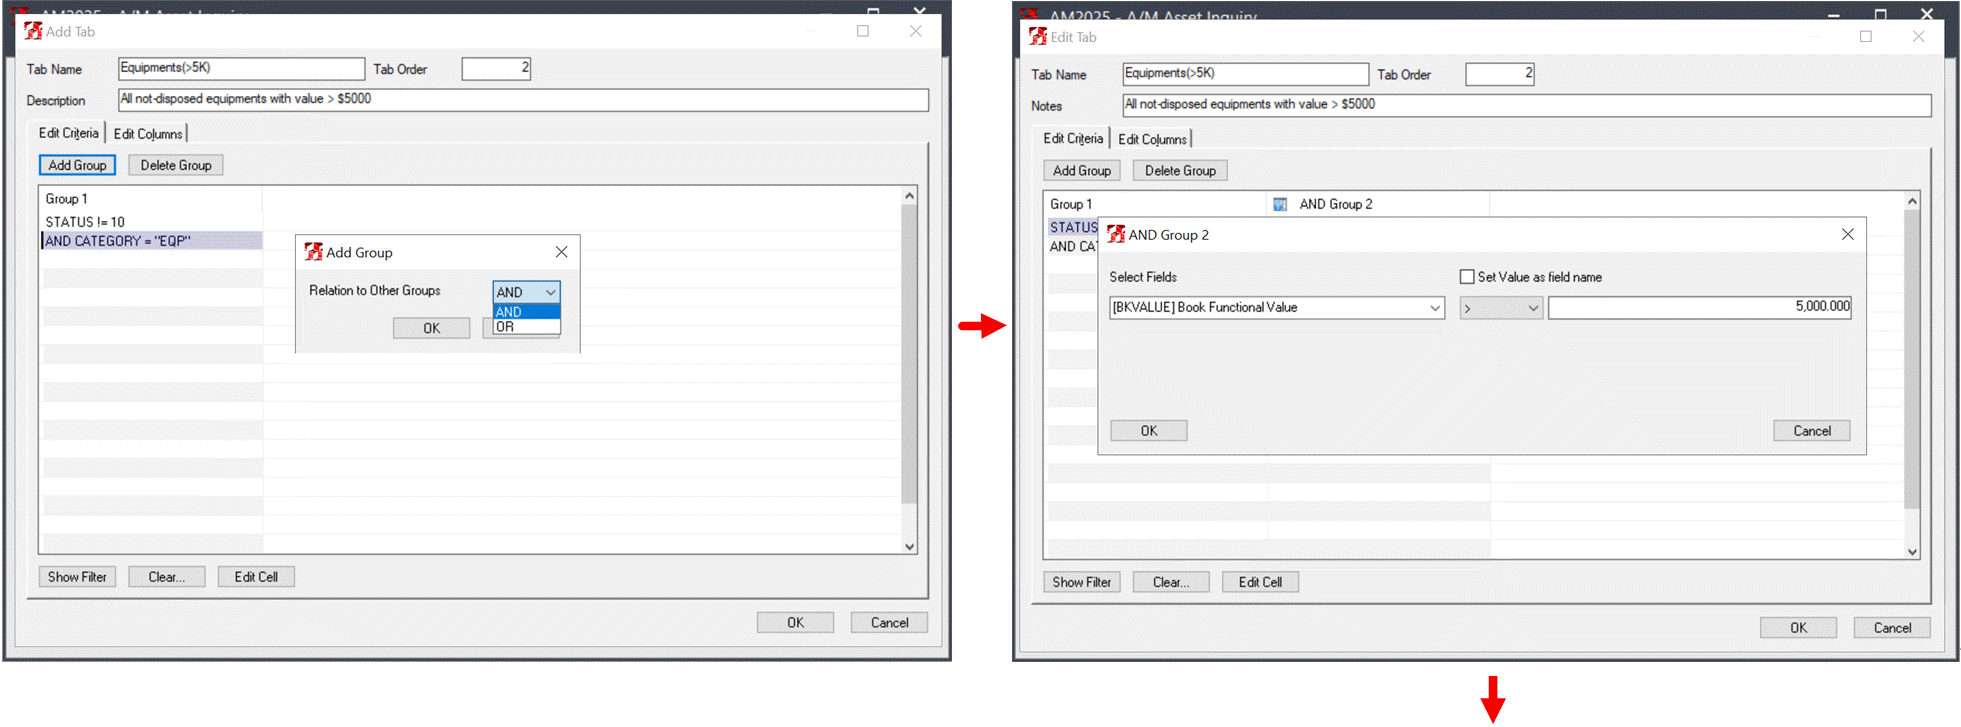
Now adding the third filter - only list the assets with value greater than 5K USD.
Here let’s see how to create another group. Click the 'Add Group' button, since this is the second group, a relation for this group with other groups must be defined.
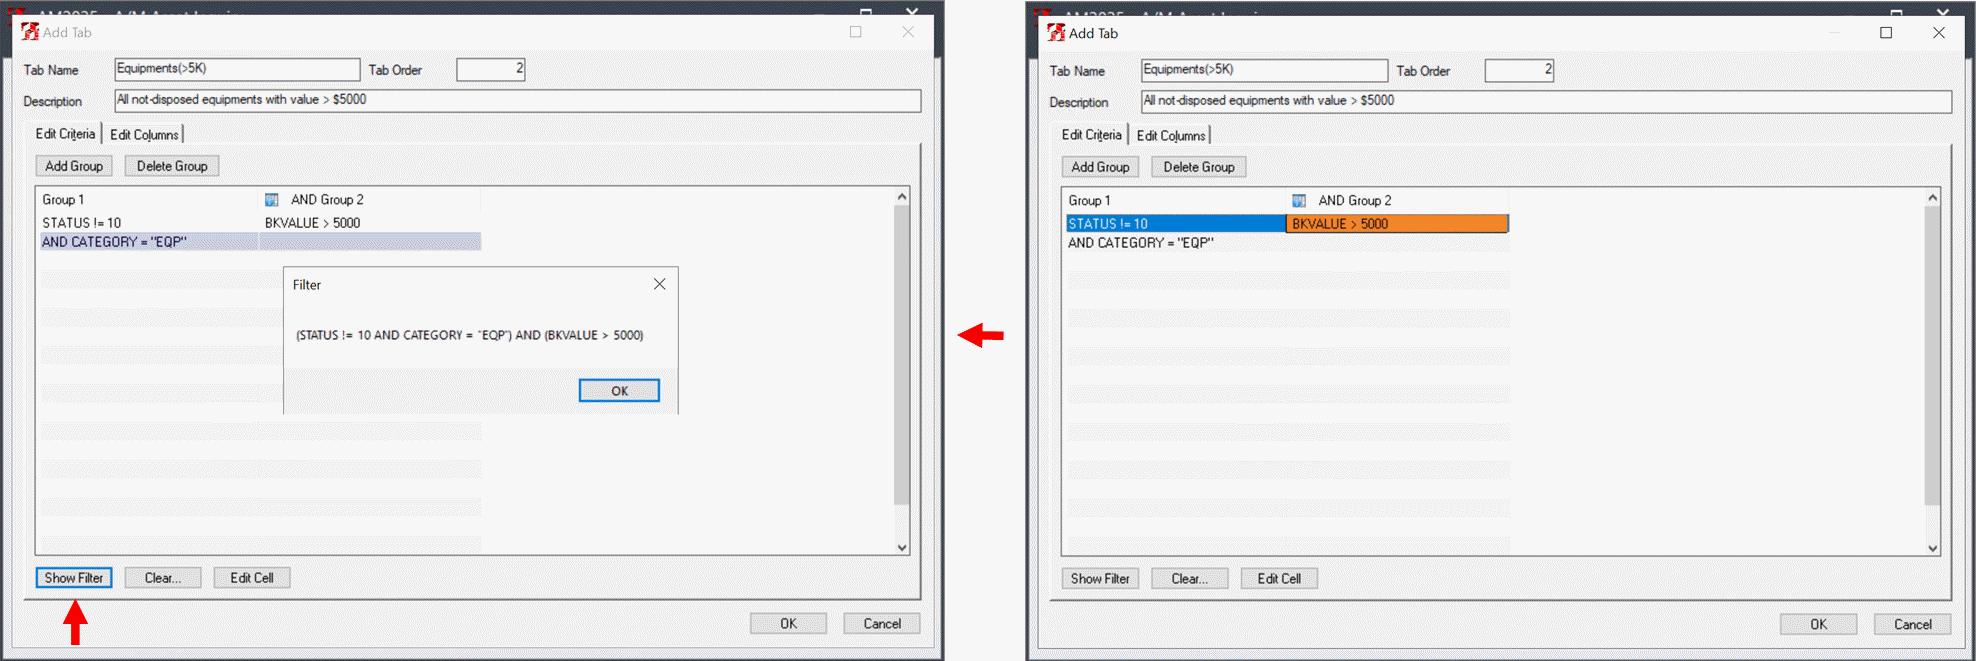
You can click the 'Show Filter' button at any time to check whether the filters you define is correct.
Now the filters are done, click the 'OK' button to go back to the Asset Inquiry main screen, where you can see a new tab with the defined name is created.
Tips:
● You can click the 'Edit Tab' button to edit the current tab at any time.
● Click the 'Delete Tab' button to remove this tab if you do not need it any more.
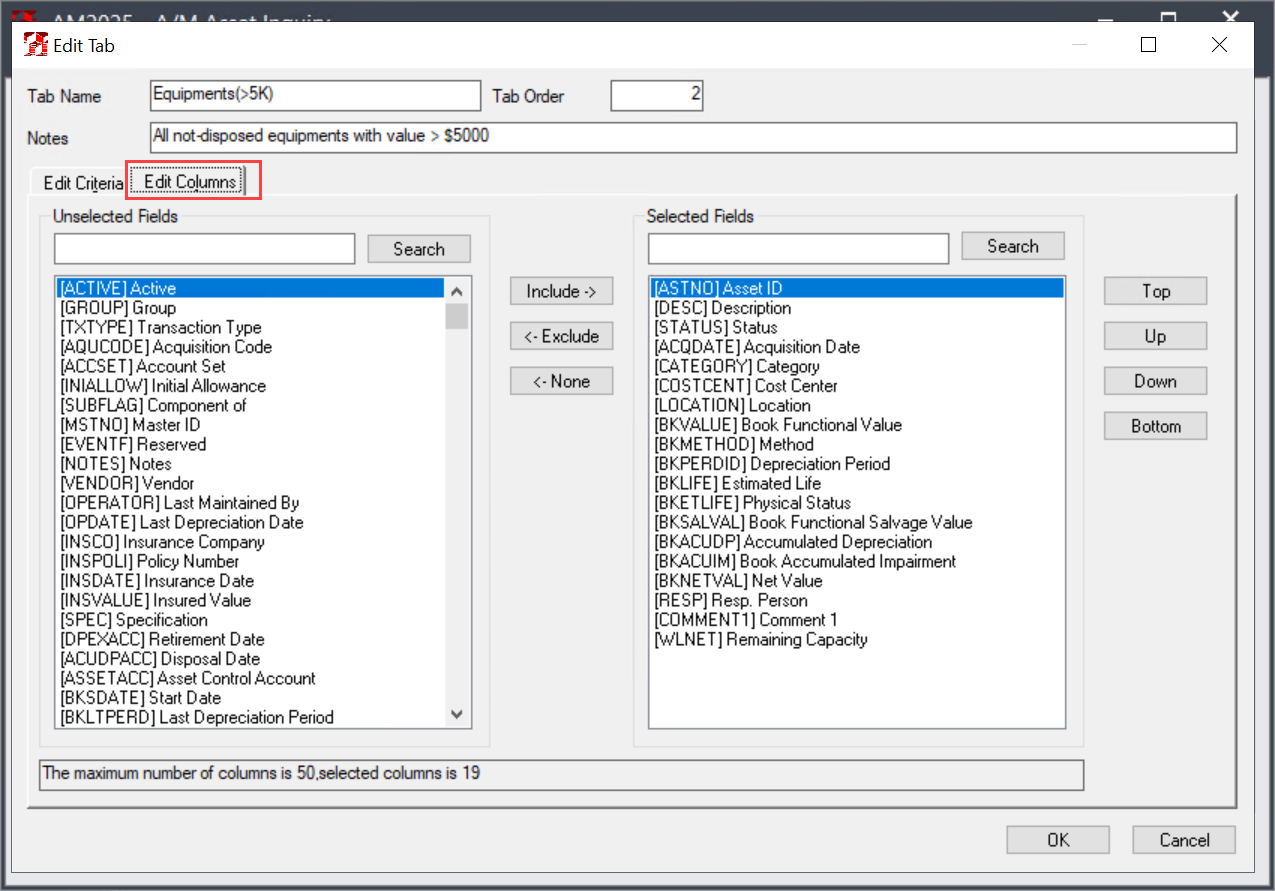
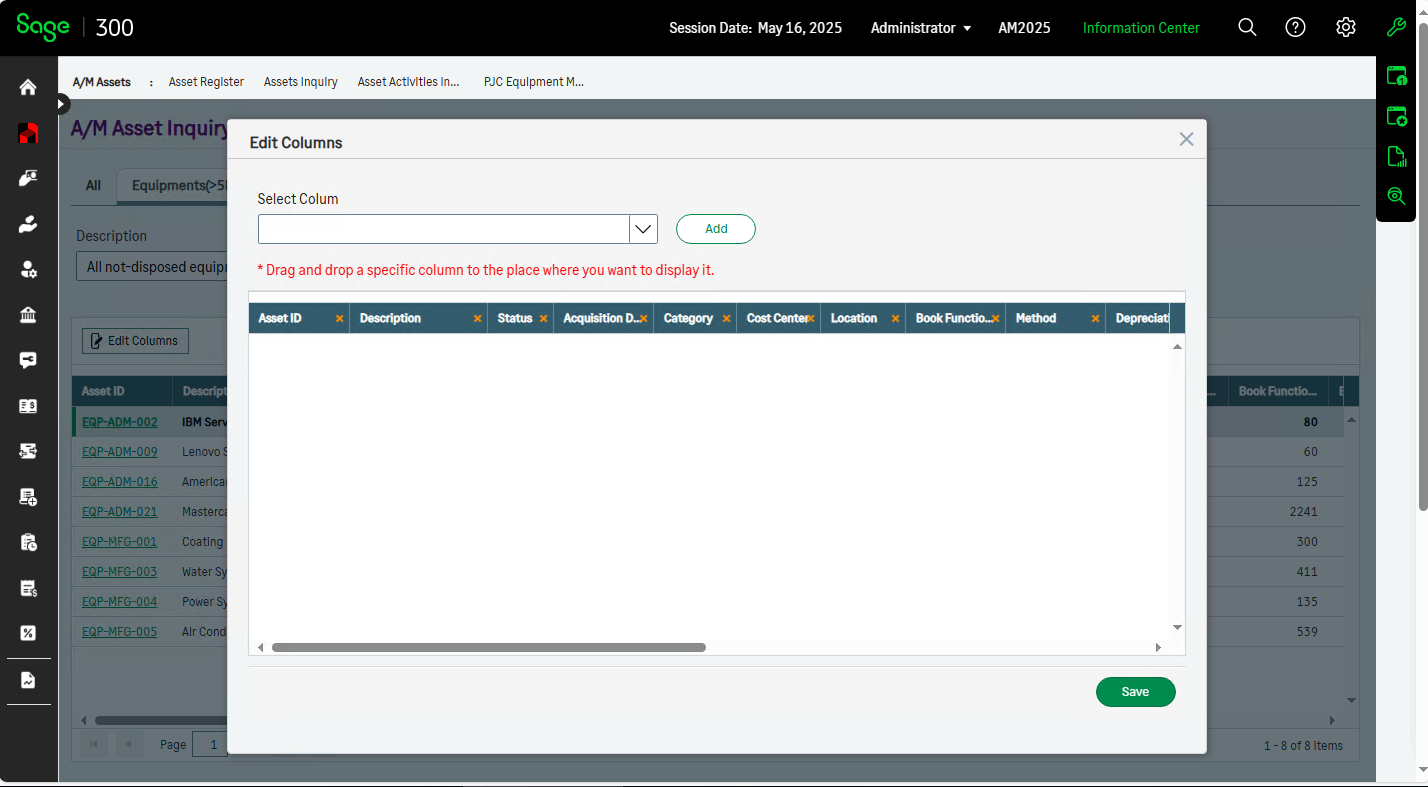
How to edit columns
Click the 'Edit Tab' button on the above picture for the following screen:
Add a Column
- Find the column (in the 'Unselected Fields' panel) you want to add, then double click it or click the 'Include' button to add it to the 'Selected Fields' panel.
Remove a Column
- Find the column (in the 'Selected Fields' panel) you want to remove, then double click it or click the 'Exclude' button to remove it.
Change Column Order
- Find the column you want to change order in the 'Selected Fields' panel, click the 'Top', 'Up', 'Down' or 'Bottom' to move it to the place where you want to display.
After column editing is done, click the 'OK' button to apply the changes.
Export Inquiry Result
Click the 'Export…' button in the Asset Inquiry main screen to export inquiry result.
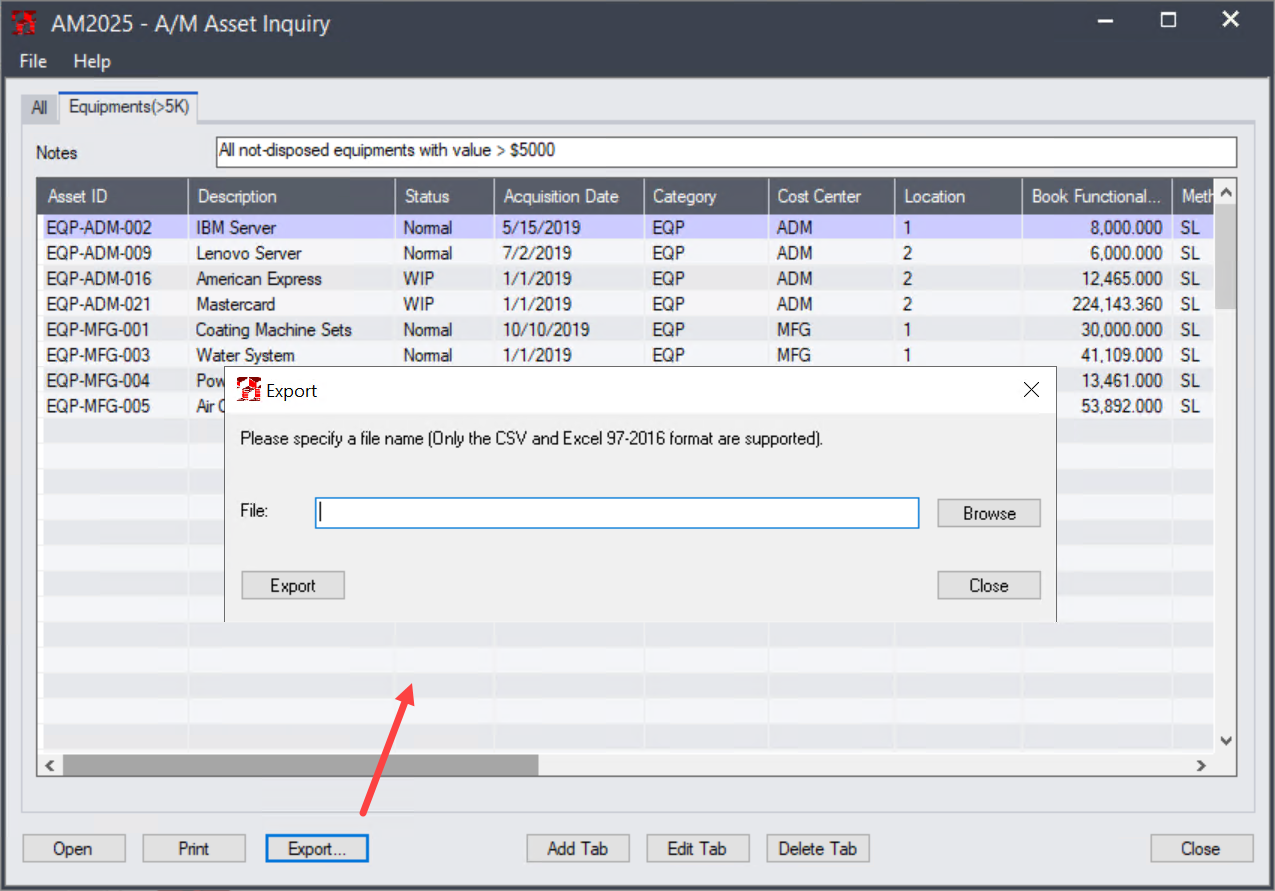
On the pop-up screen, click the ‘Browse’ button to specify where to save the result, then click the ‘Export’ button to finish the export process.
Notes:
● You can either export the result to an excel or csv file.
● MS Excel must be installed on your machine if you want to export the result to excel file.
Tip:
The above three new features are available in the Web Screen version as well.
Part II - New Features
Sage 300 Integration
Asset Management 2025 integrates with the following Sage 300 versions:
● Version 2019
● Version 2020
● Version 2021
● Version 2022
● Version 2023
● Version 2024
● Version 2025
In addition, the performance and stability of Web Screen version are significantly improved in this version.
Acquisition
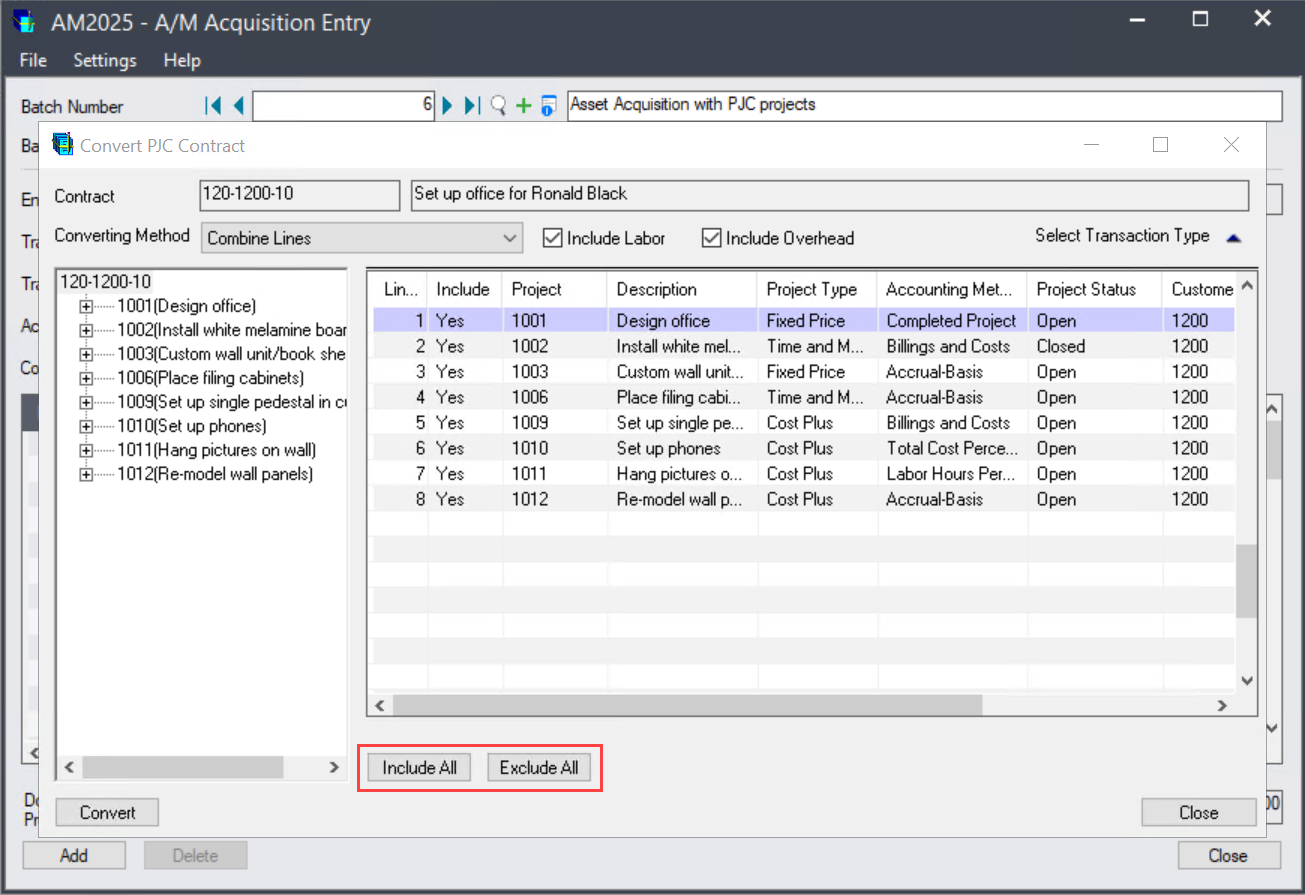
Provides the ability to select and dis-select all projects when converting PJC projects to fixed assets.
Split
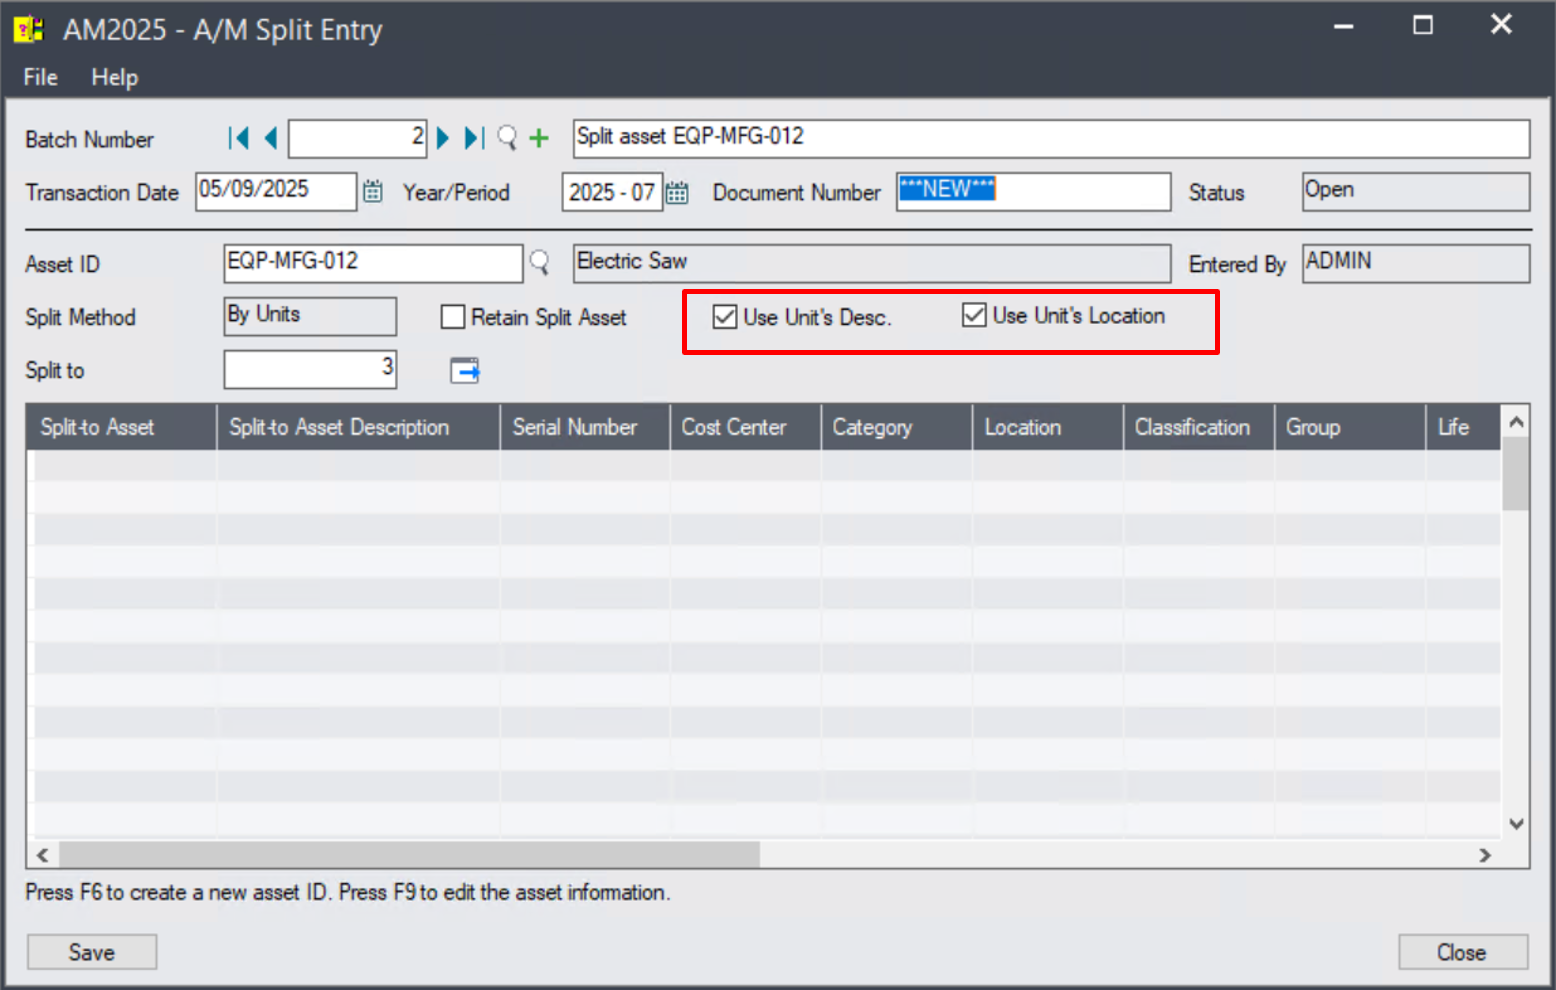
If description and location for units are maintained in Asset Register/Units tab, they can be copied to the split-to assets during split process.

To enable this feature, select the following two options then click the 'Go' button.
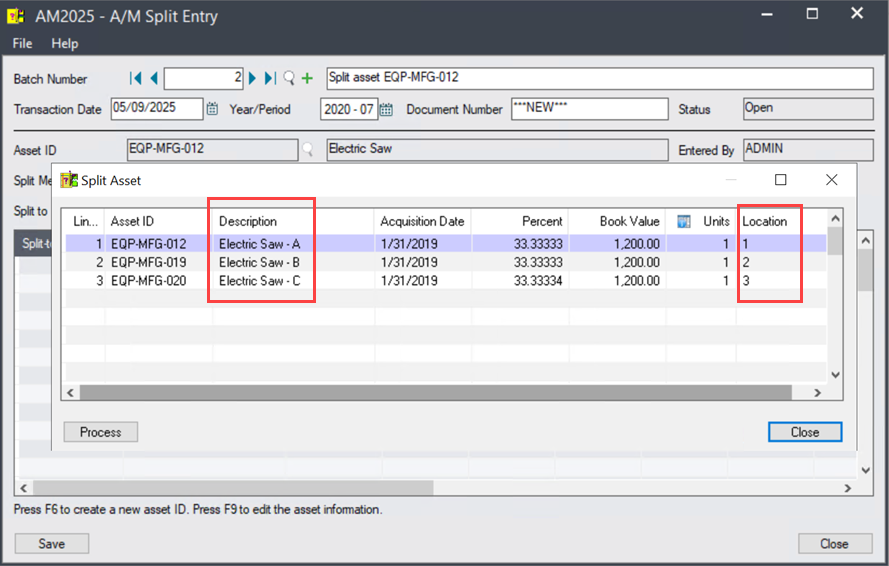
On the Split-Asset screen, units’ desription and location are copied to the Split-to assets.
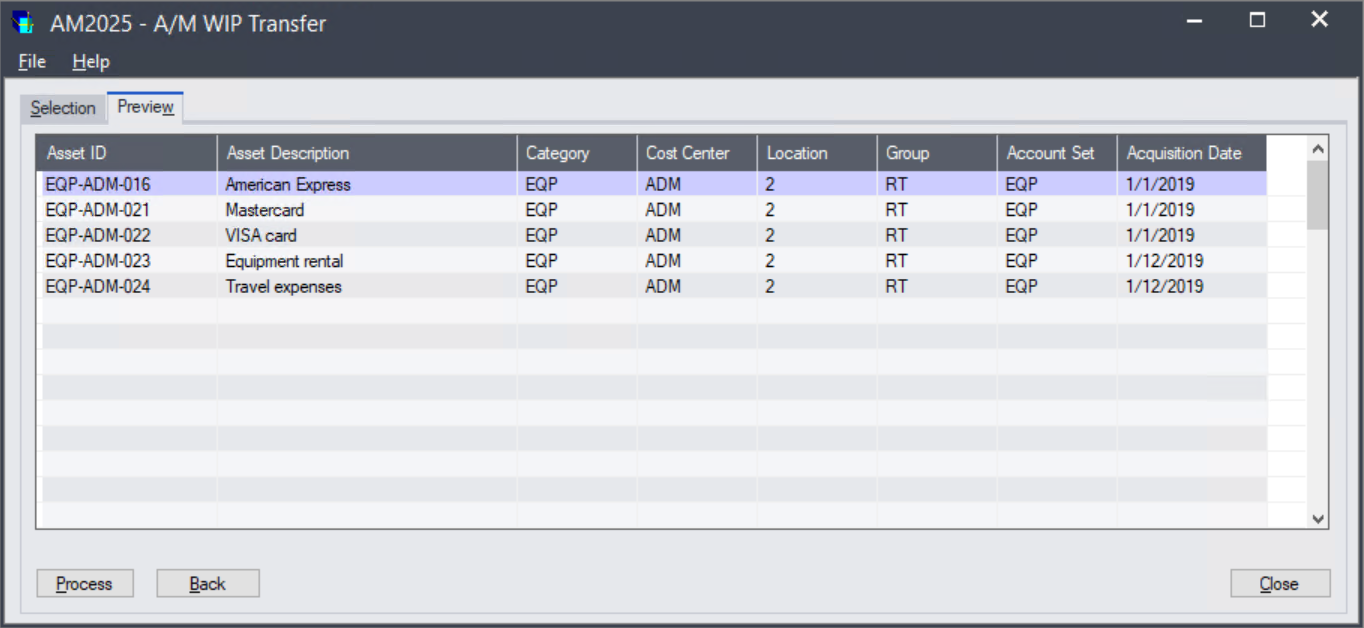
WIP Transfer
This new version allows you to preview the to-be-transferred WIPs/Assets before transfer being processed.
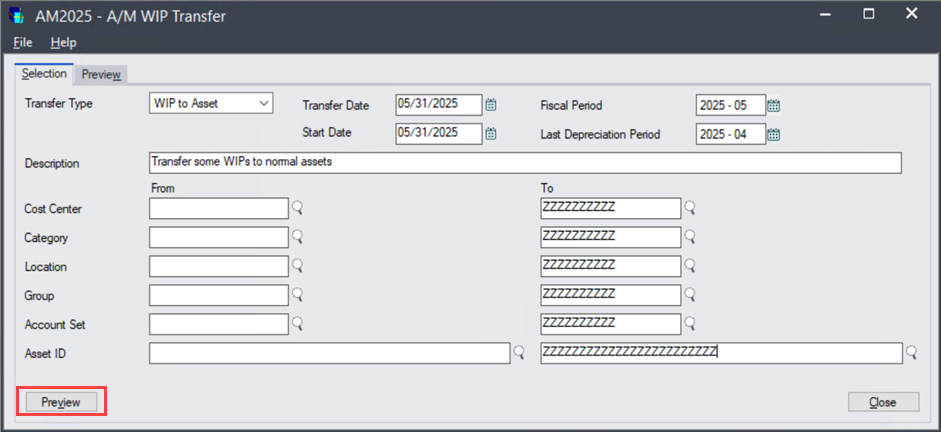
On the 'Preview' screen, you can remove the WIP/Assets which you don't want to perform transfer for now.
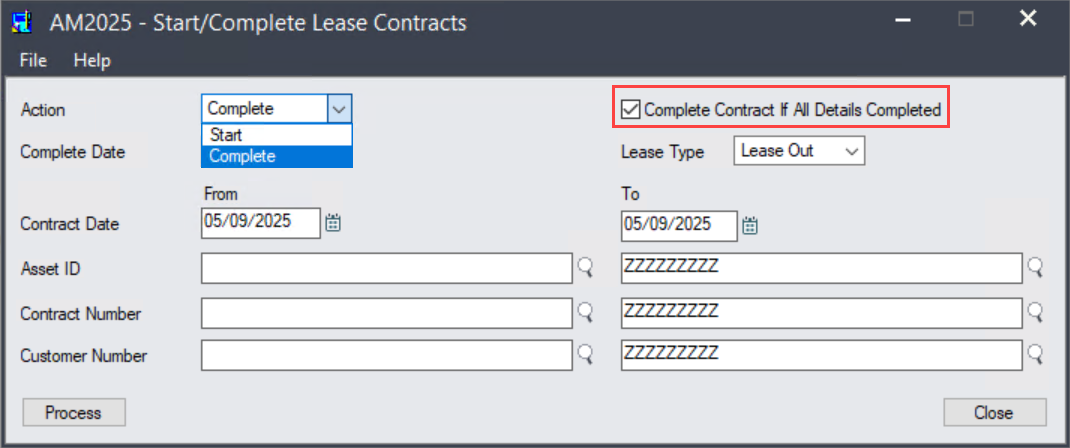
Asset Leasing
In this new version, the 'Start Lease Contracts' utility is renamed to 'Start/Complete Lease Contracts', where you can also complete a number of contract detail lines across multiple lease contracts with several mouse click. 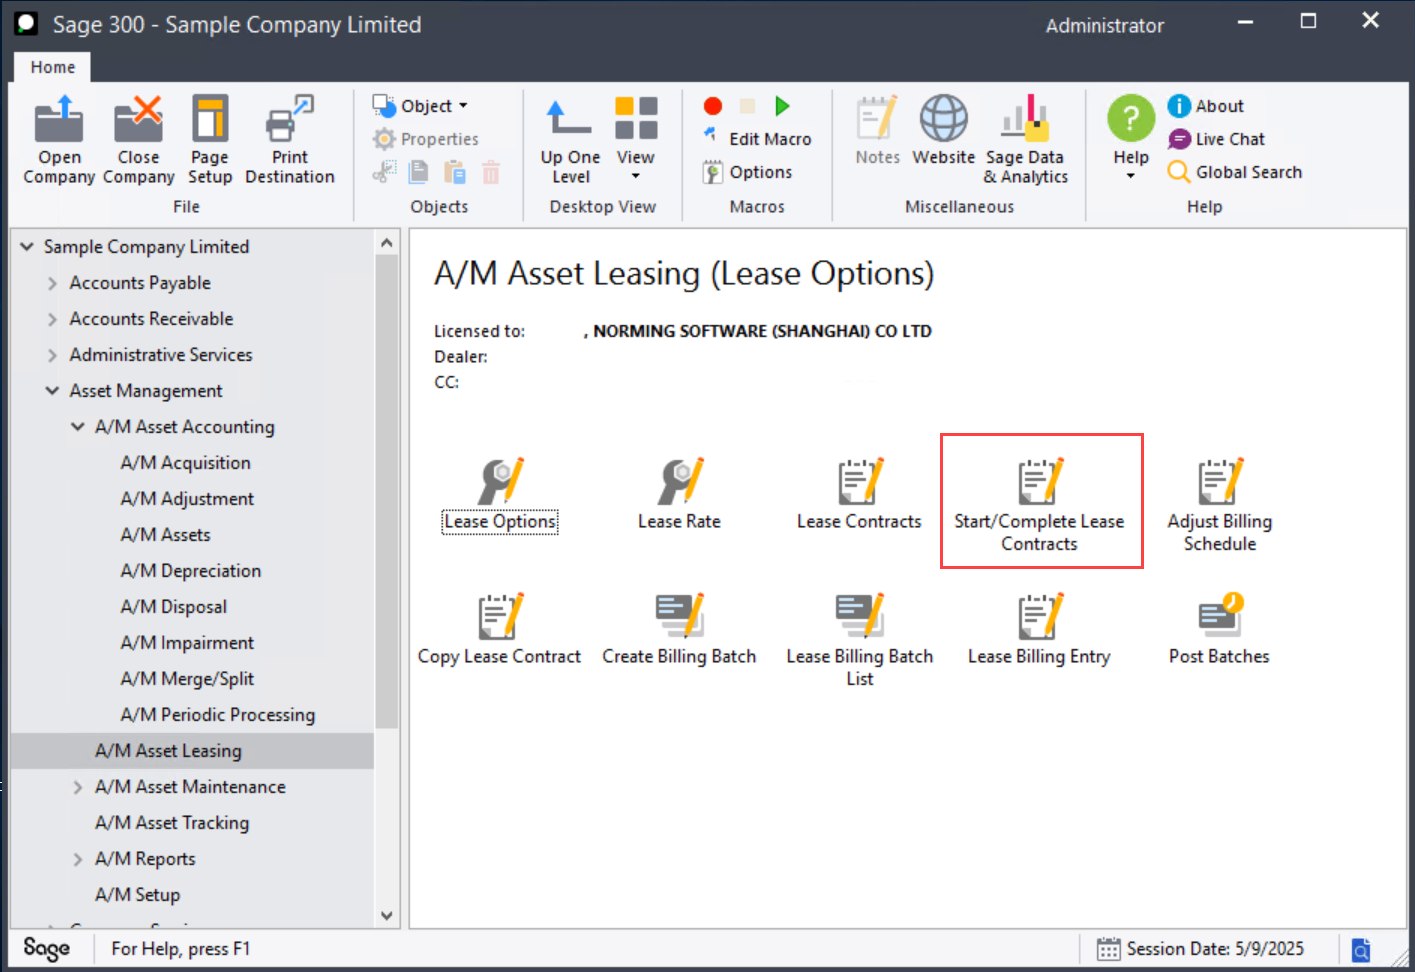
Select the below highlighted option to let the system automatically close the lease contracts if all of the details are completed.