February 21st 2025
Dear Partners,
Thanks for your continued support of Norming solutions. Norming Resource Manager 2025 is released with one new module and a number of new features.
Below please find the details.
New Module
A/R Invoice Requisition
Purpose of the module
Add Approval Workflow to make sure invoices have been checked and approved before sending to customers.
How to set up the module
Step 1 - Enable AR Invoice Requisition Module for the entity.
Go to R/M Global Setup > Option Screen, select Module Tab, and tick the option of "Use A/R Invoice Requisition".
Click 'Save' Button to save the change, and software prompts a warning to remind user to restart Sage300 to apply the change.
After Sage 300 restarted, 'A/R Invoice Requisition' will be seen under Resource Manager > Sales & AR Requisitions 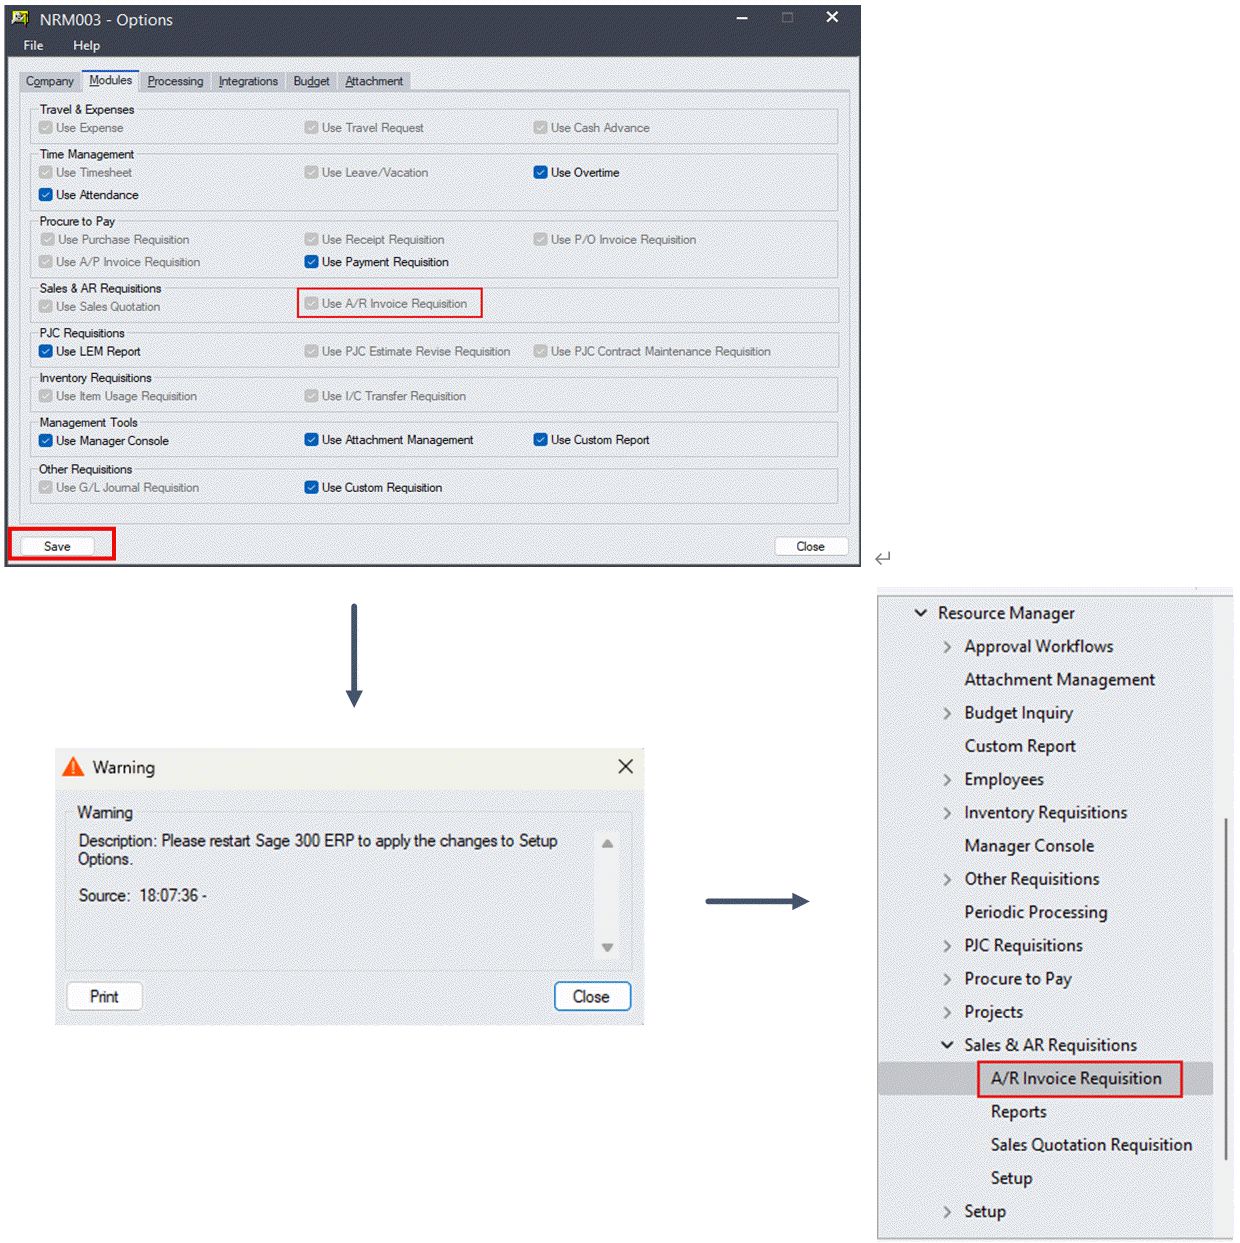
Step 2 - Set up AR Invoice Options
Open screen Sales & AR Requisitions > Setup > Options to configure settings for A/R Requisition module, assuming the entity already has other requisition workflow. 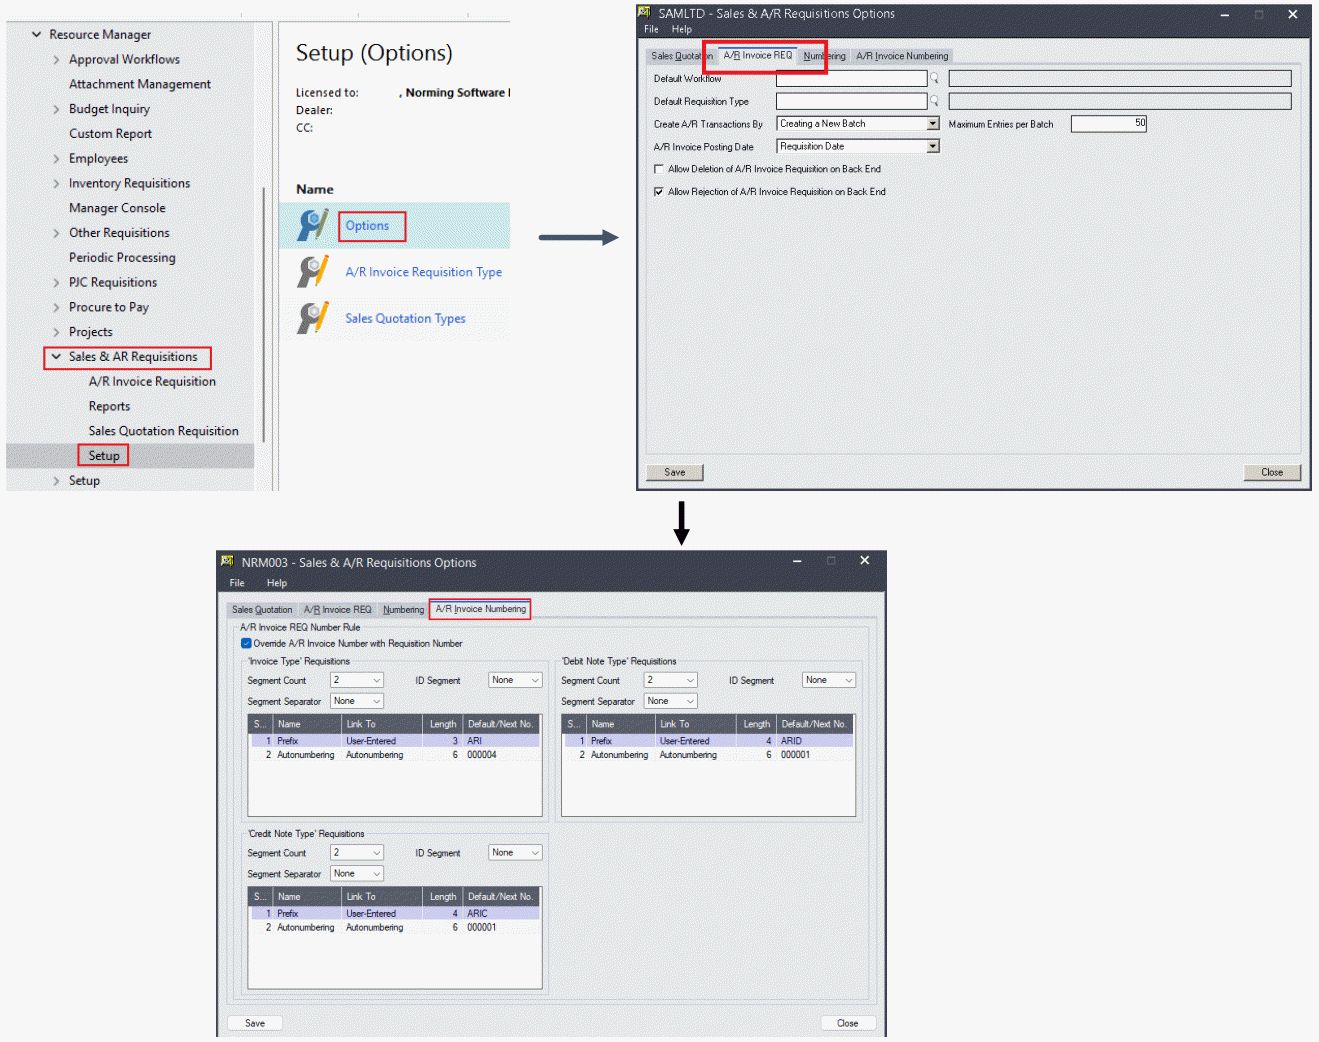
Step 3 - Set up Email Template for AR Invoice Requisition Module 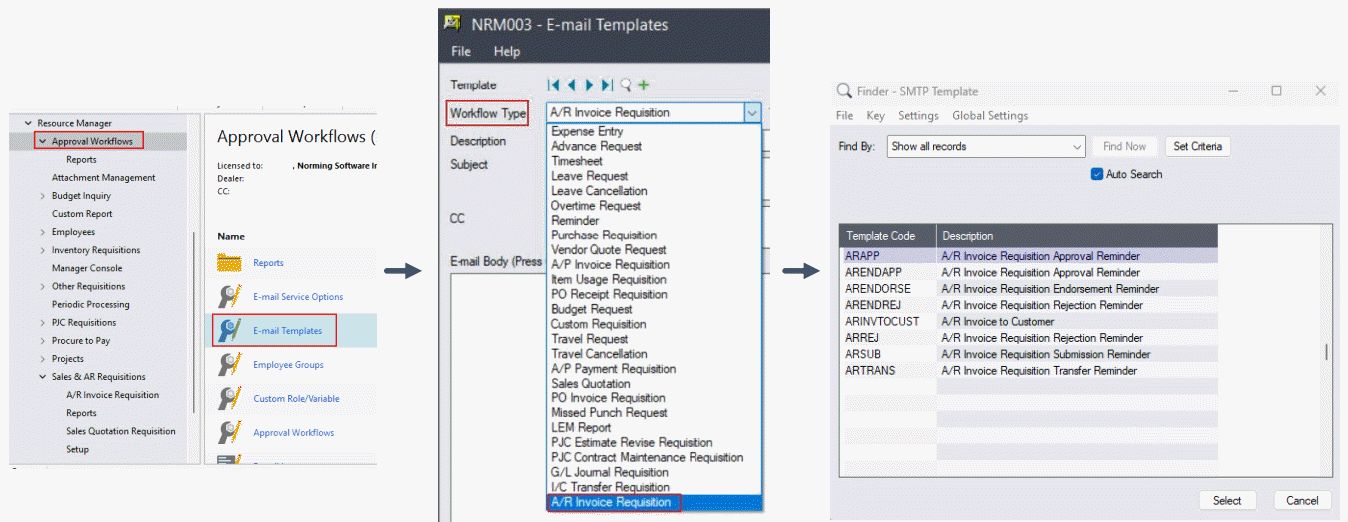
Step 4 - Set up Approval Workflow for AR Invoice Requisition Module. 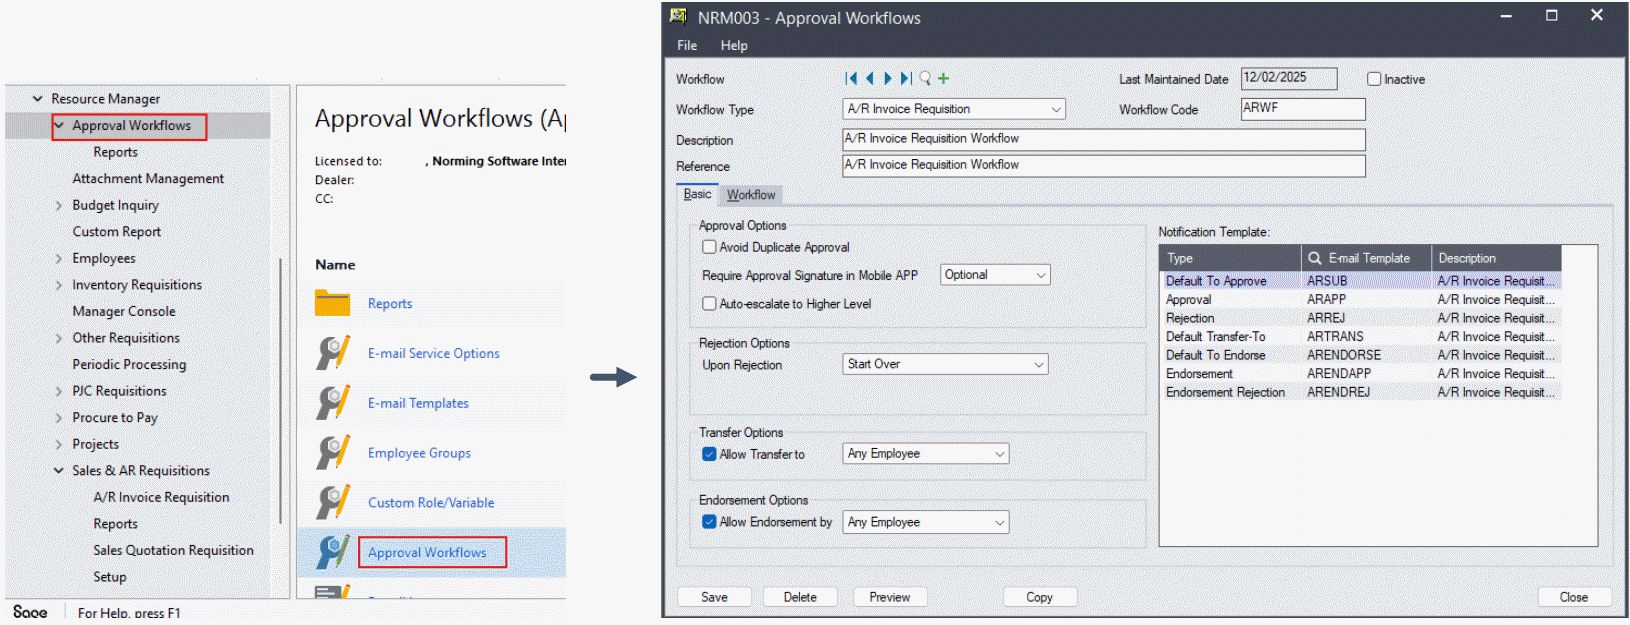
Step 5 - Create AR Invoice Requisition Type and set Employee Permissions if required. 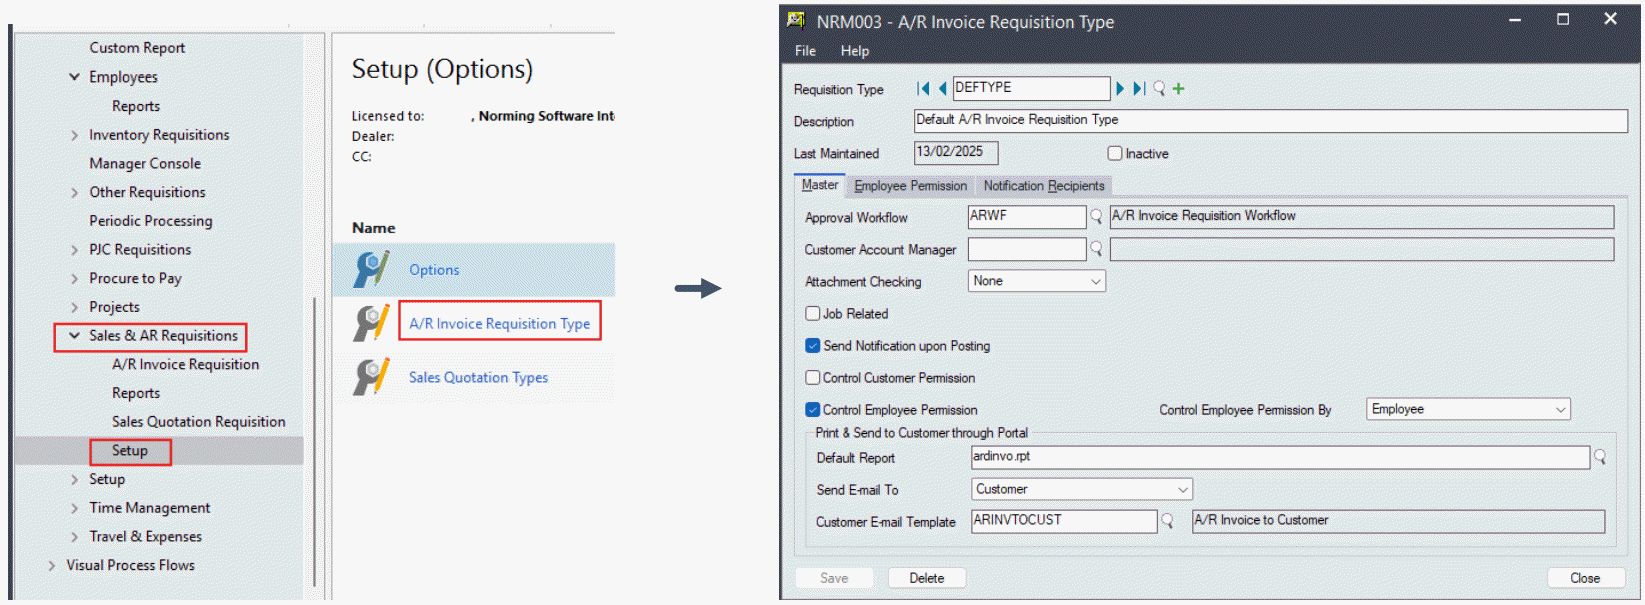
Step 6 - Configure Web Portal Setting for AR Invoice Requisition Module in R/M Web Admin Portal.
Enable AR Invoice Requisition Module for specific user(s).
Configure user screen of R/M web portal for AR Invoice Requisition. 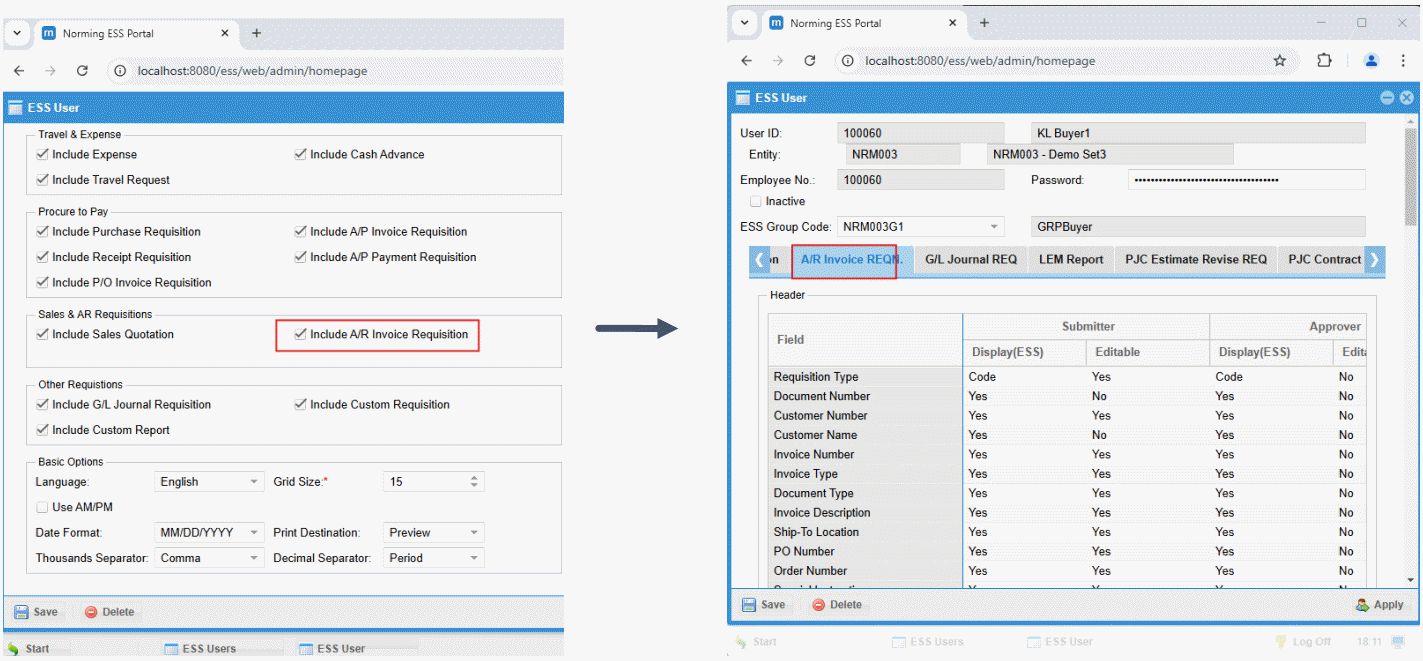
How to use the module
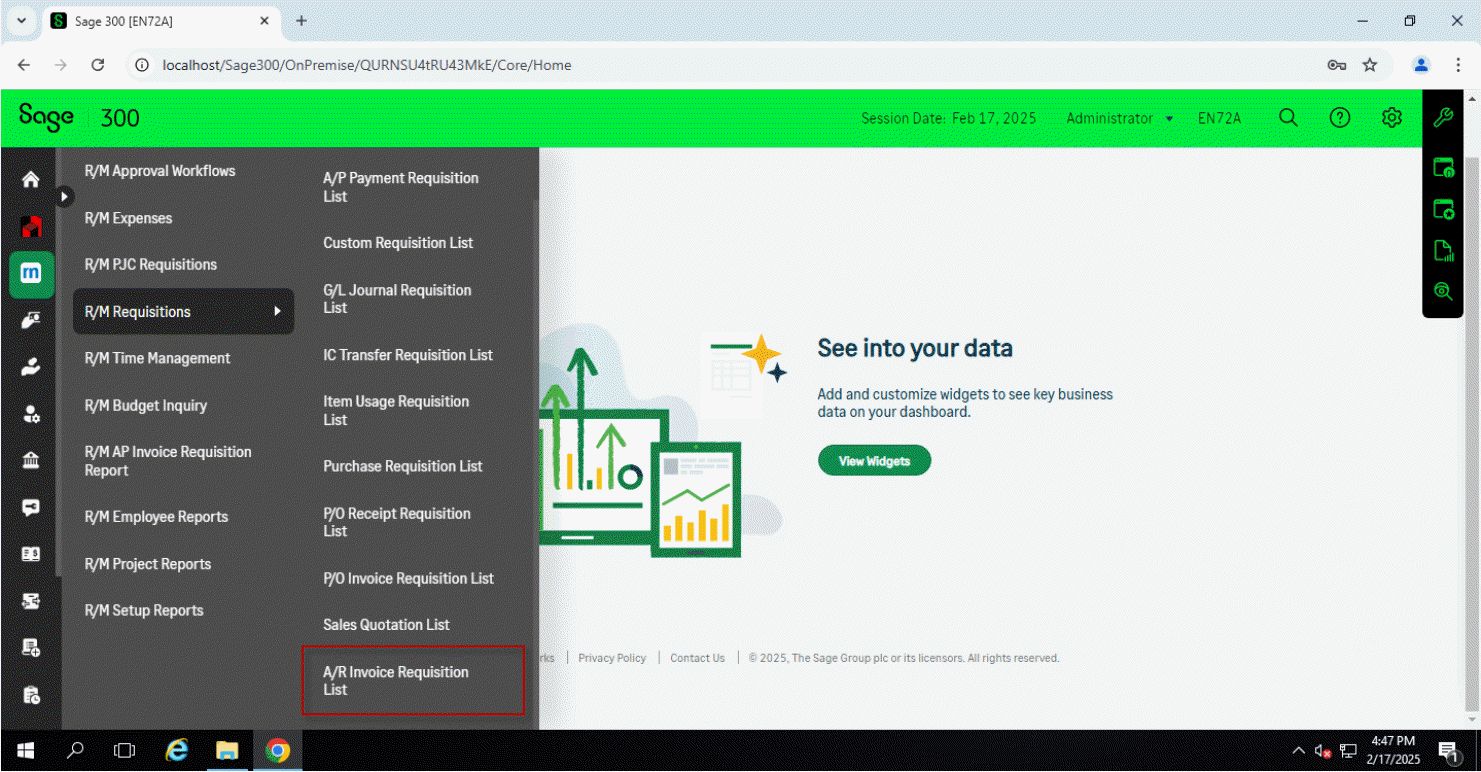
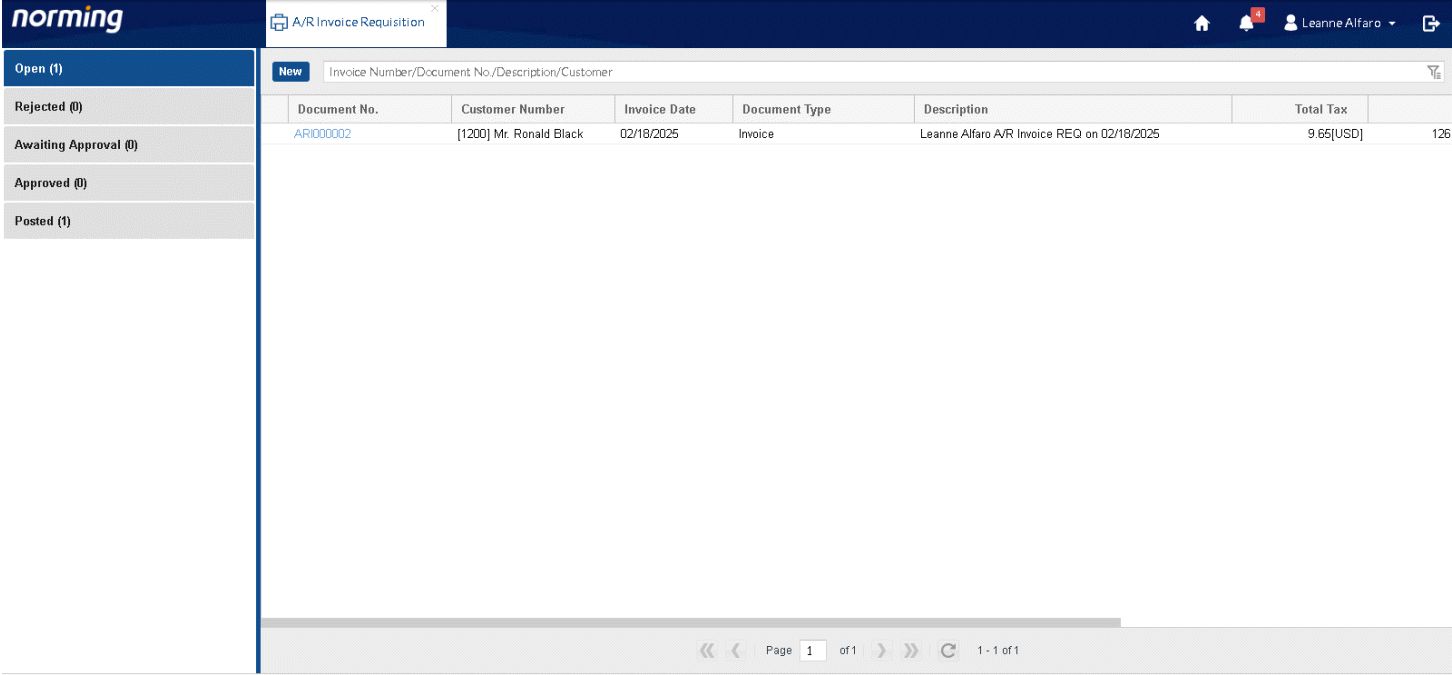
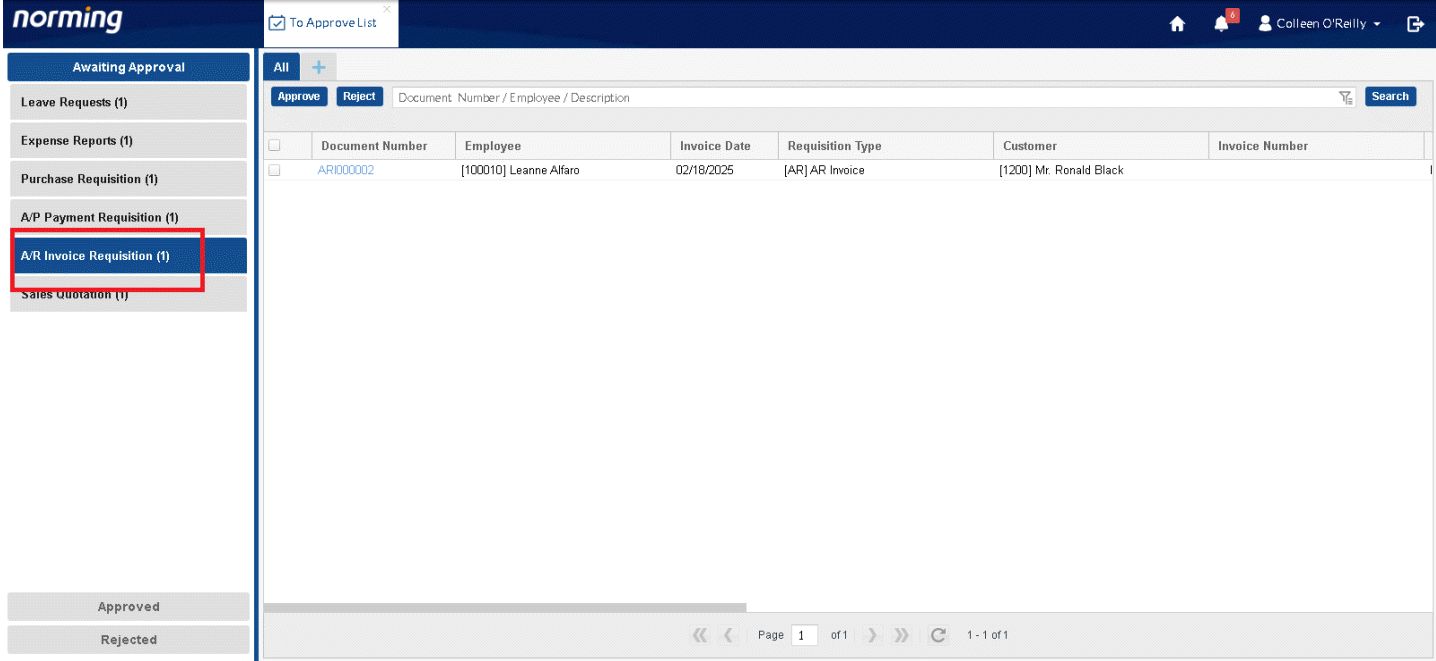
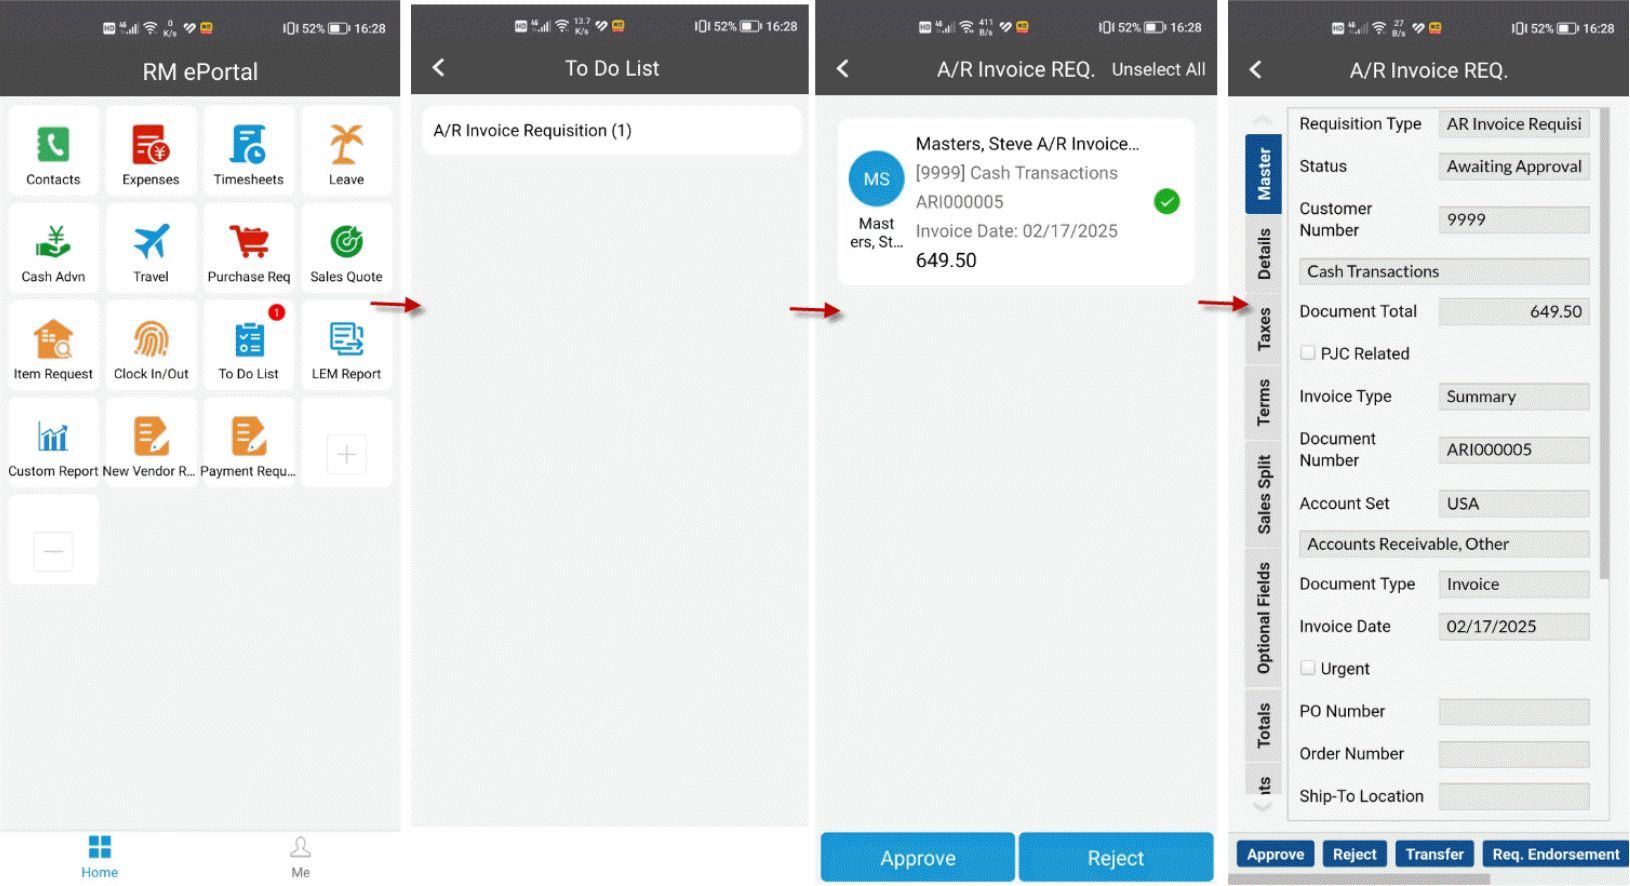
Log in Resource Manager Web Employee Portal, go to Sales & AR Requisitions menu, then click into the A/R Invoice Requisition icon.
User Screen - 1 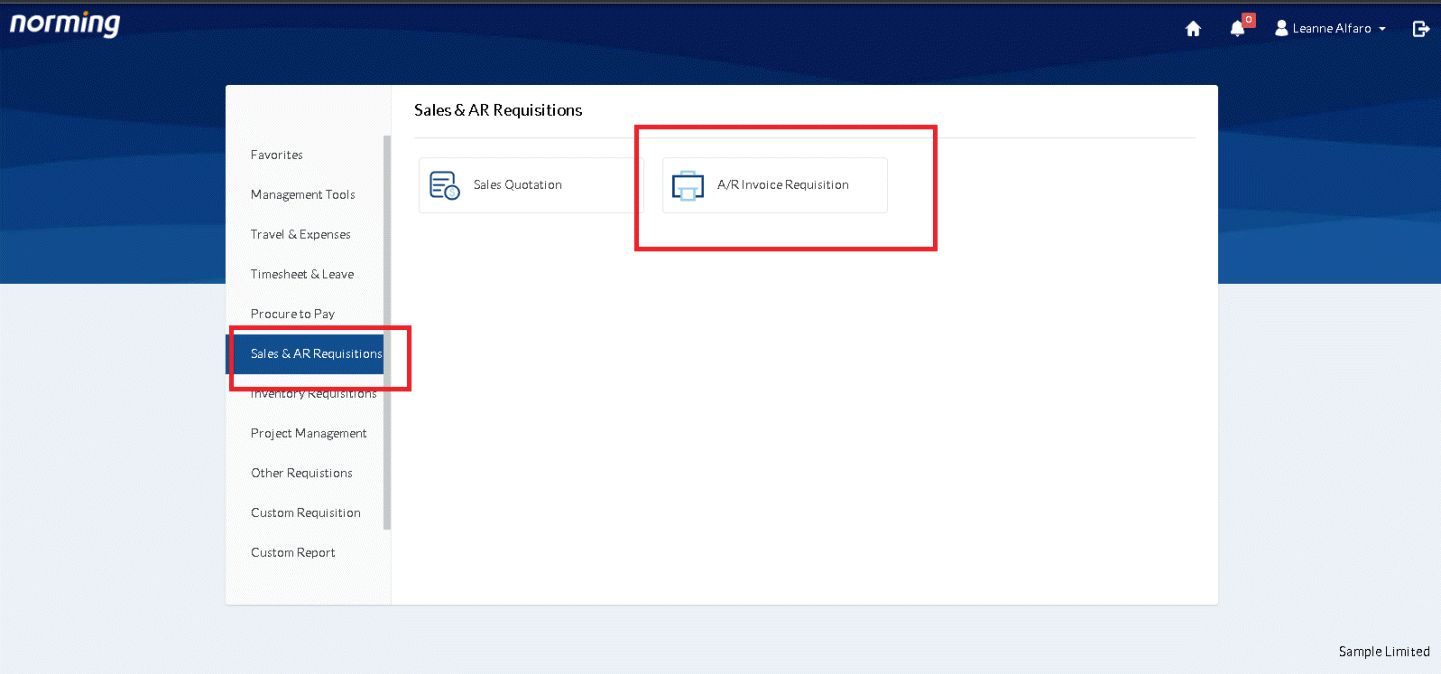
User Screen - 2
User Screen - 3
User Screen - 4
User Screen - 5
User Screen - 6
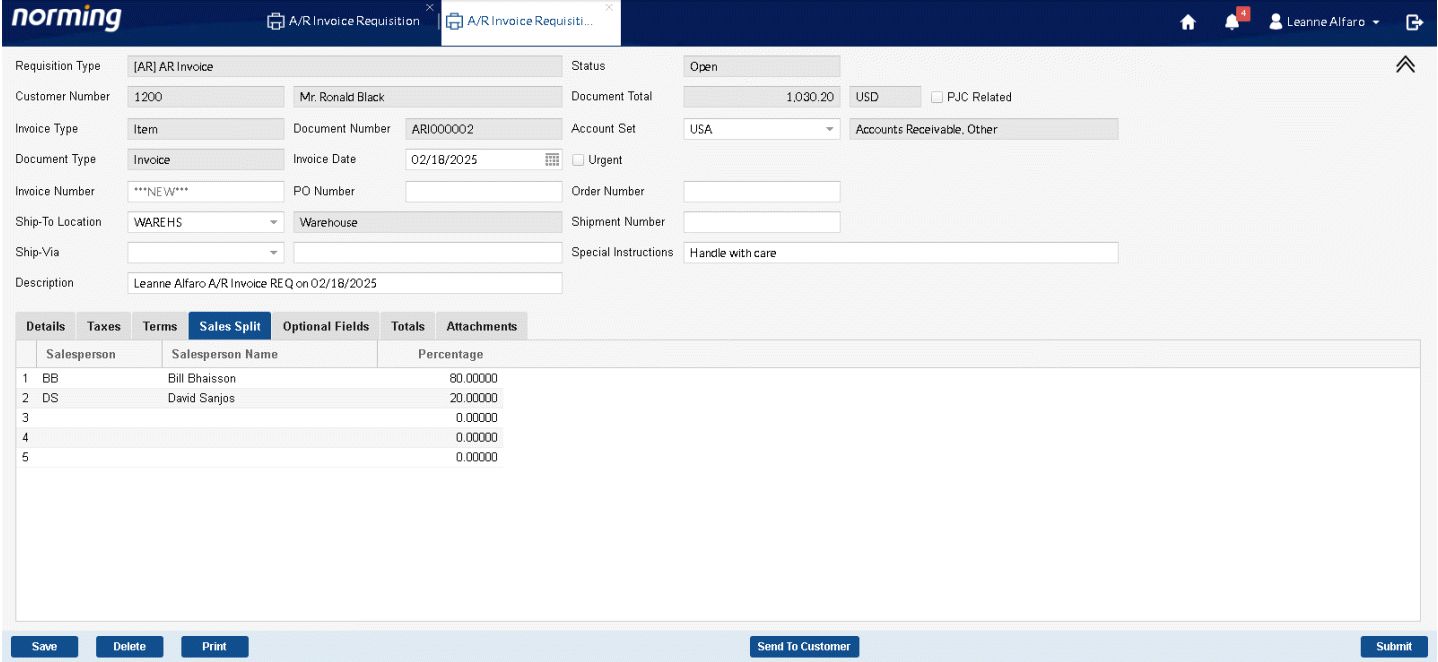
User Screen - 7
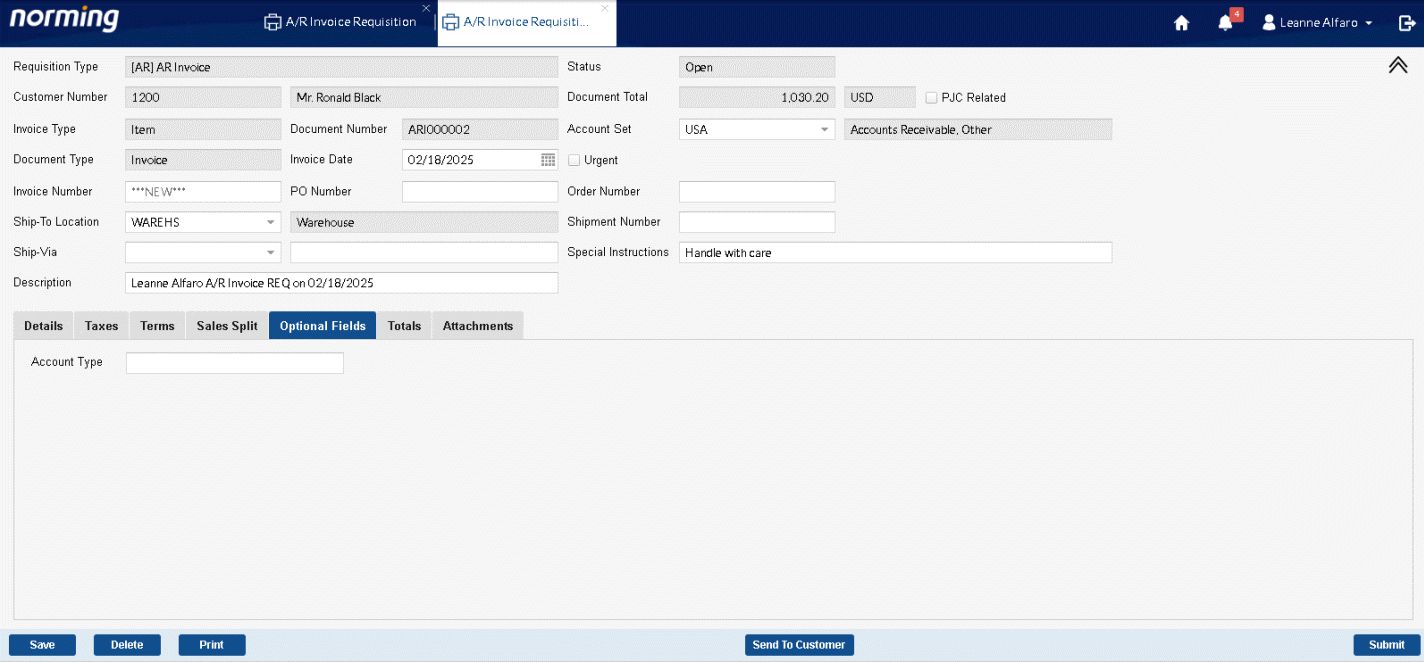
User Screen - 8
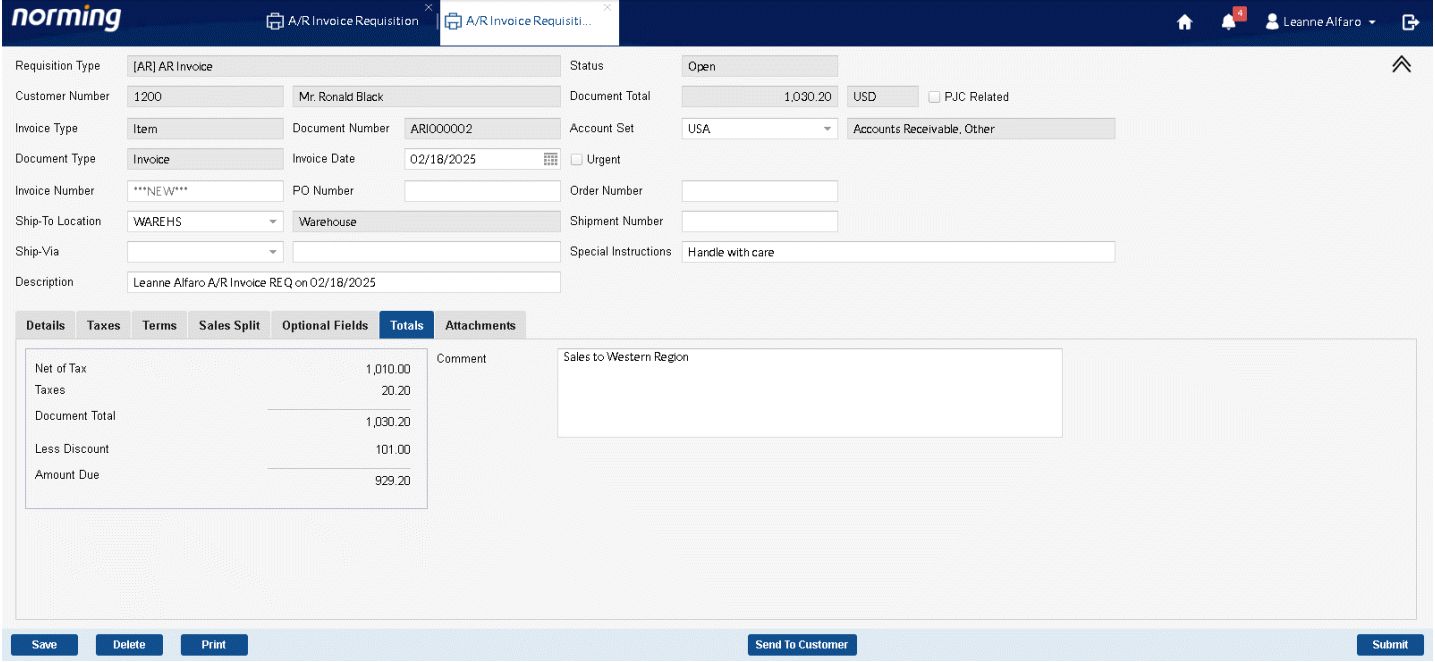
User Screen - 9
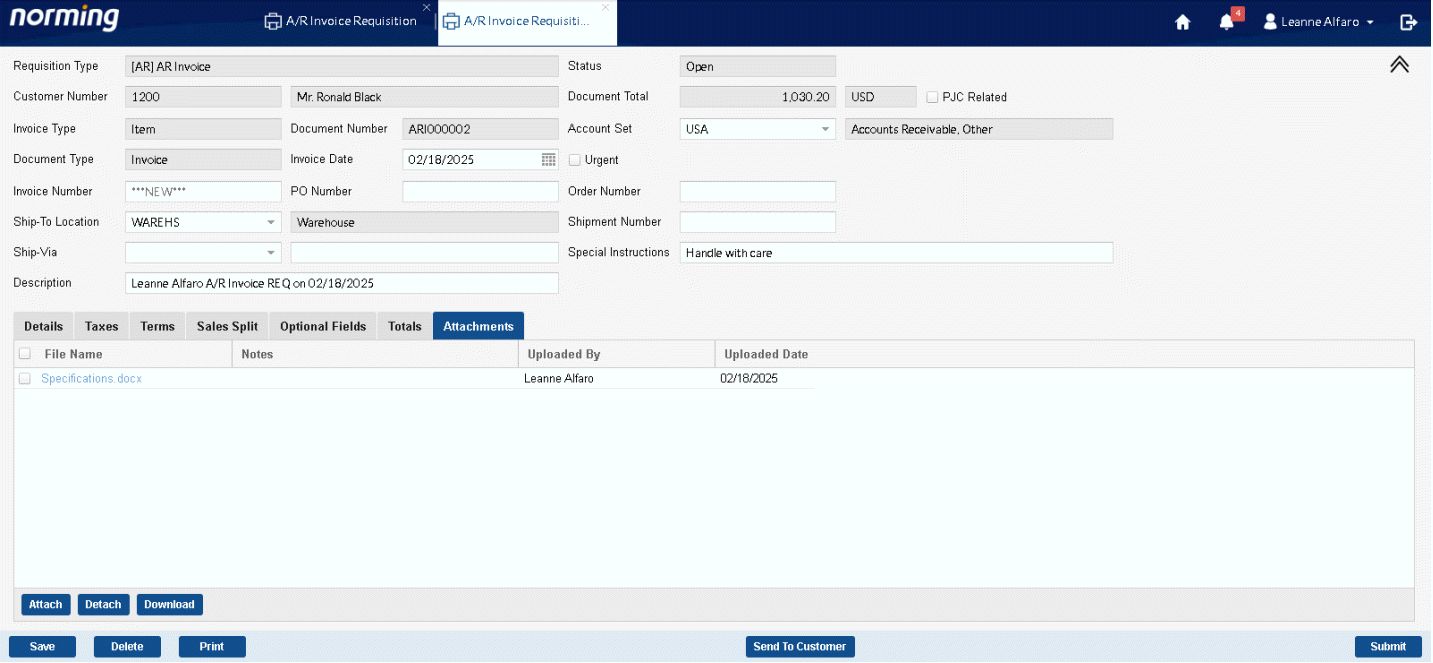
User Screen - 10
User Screen - 11
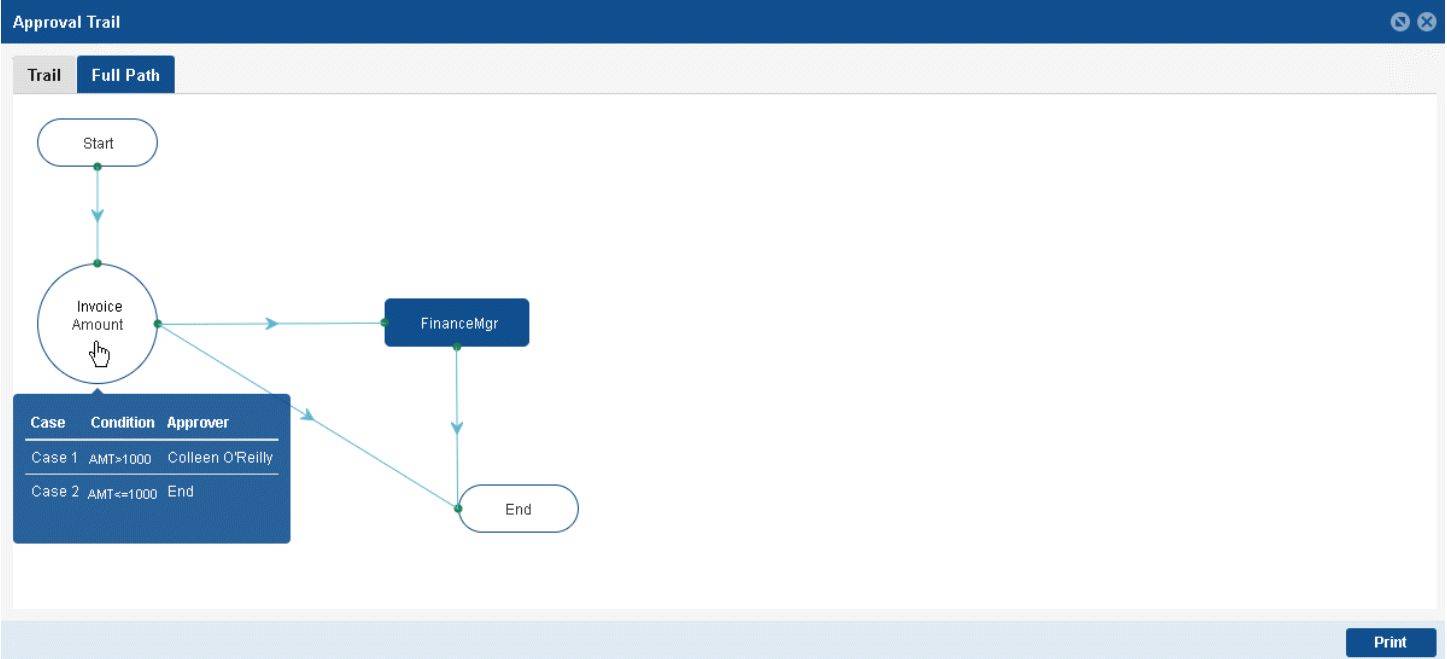
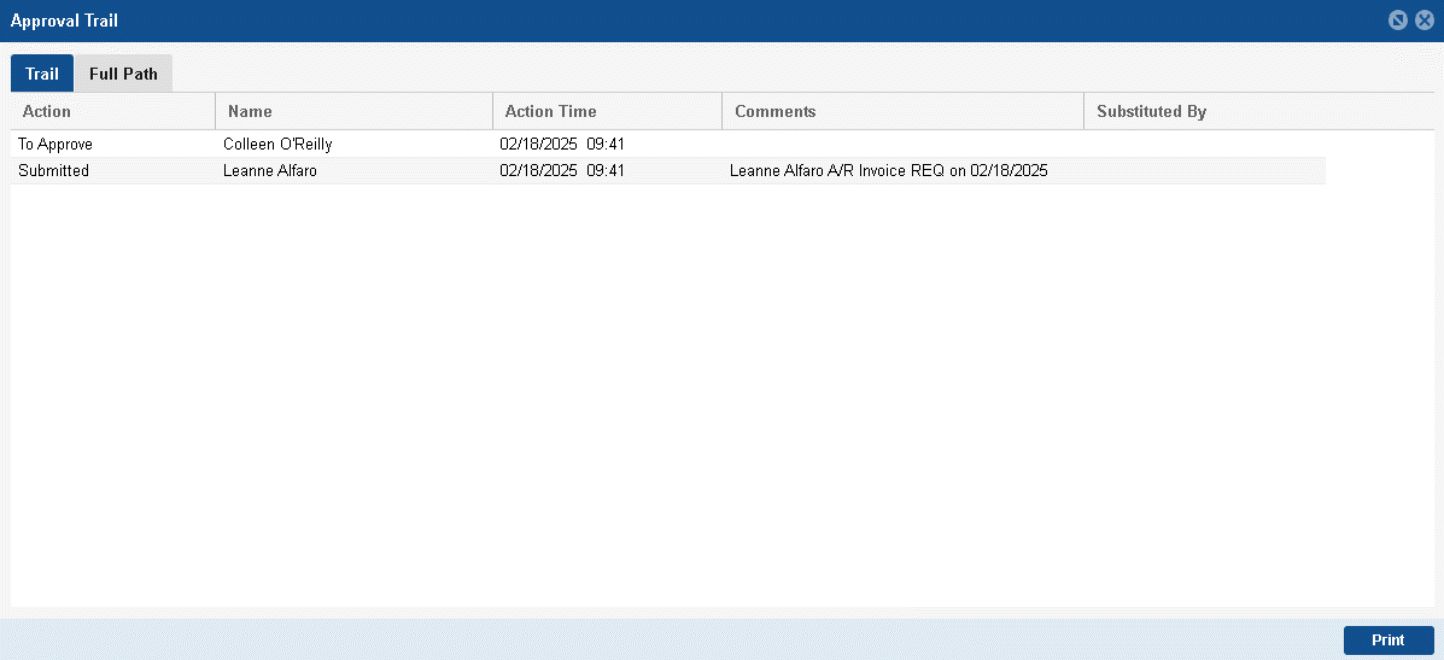
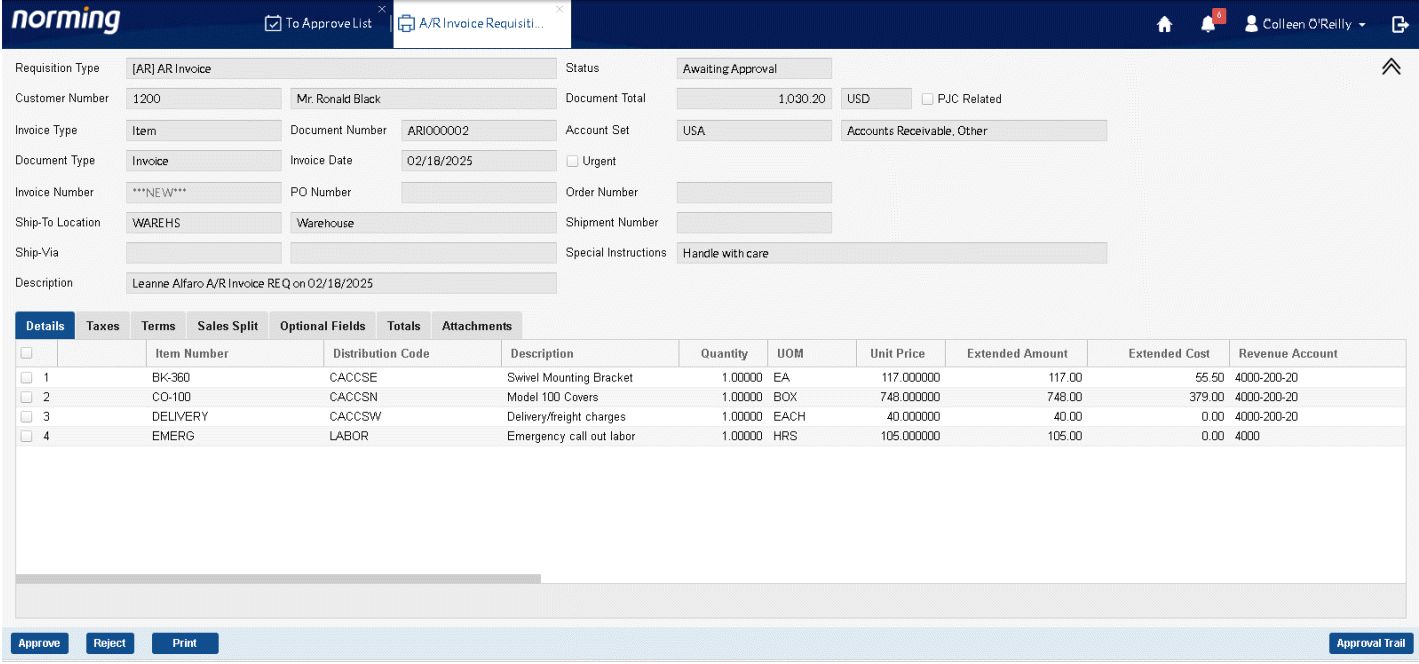
Approve A/R Invoice Requisition
Post A/R Invoice Requisition
AR Invoice Requisition List and Entry are available in R/M back end, similar to other requisition type.
AR Invoice Requisitions List: 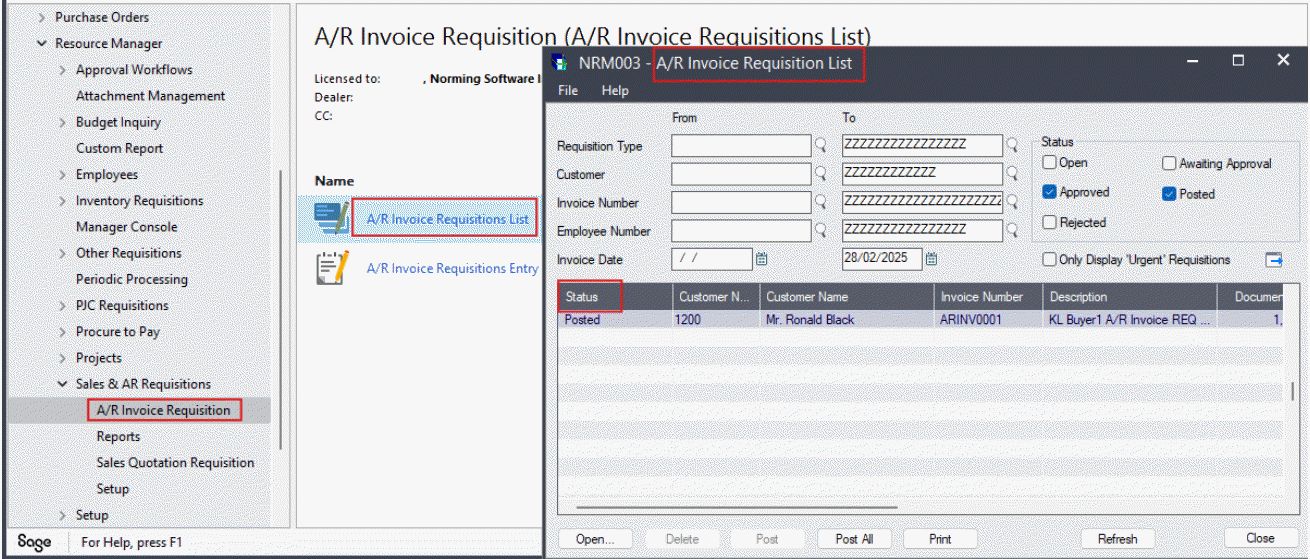
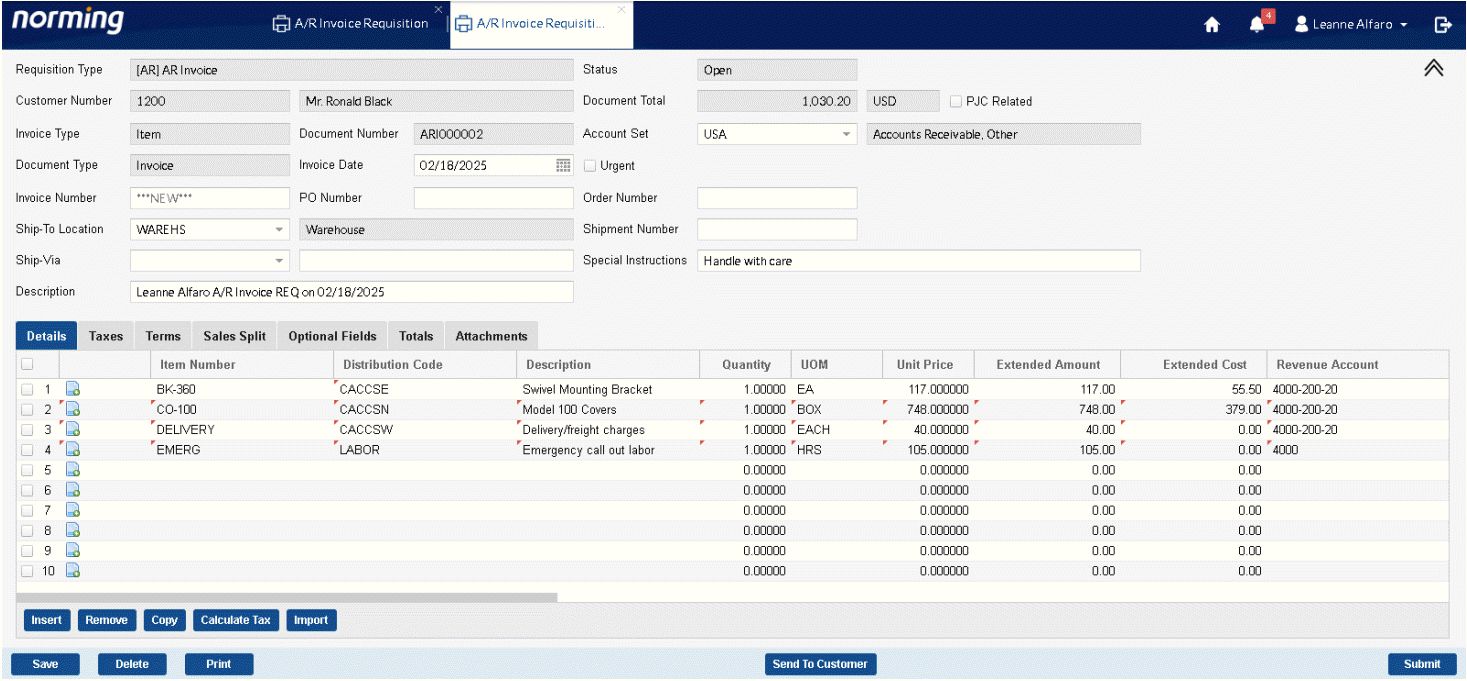
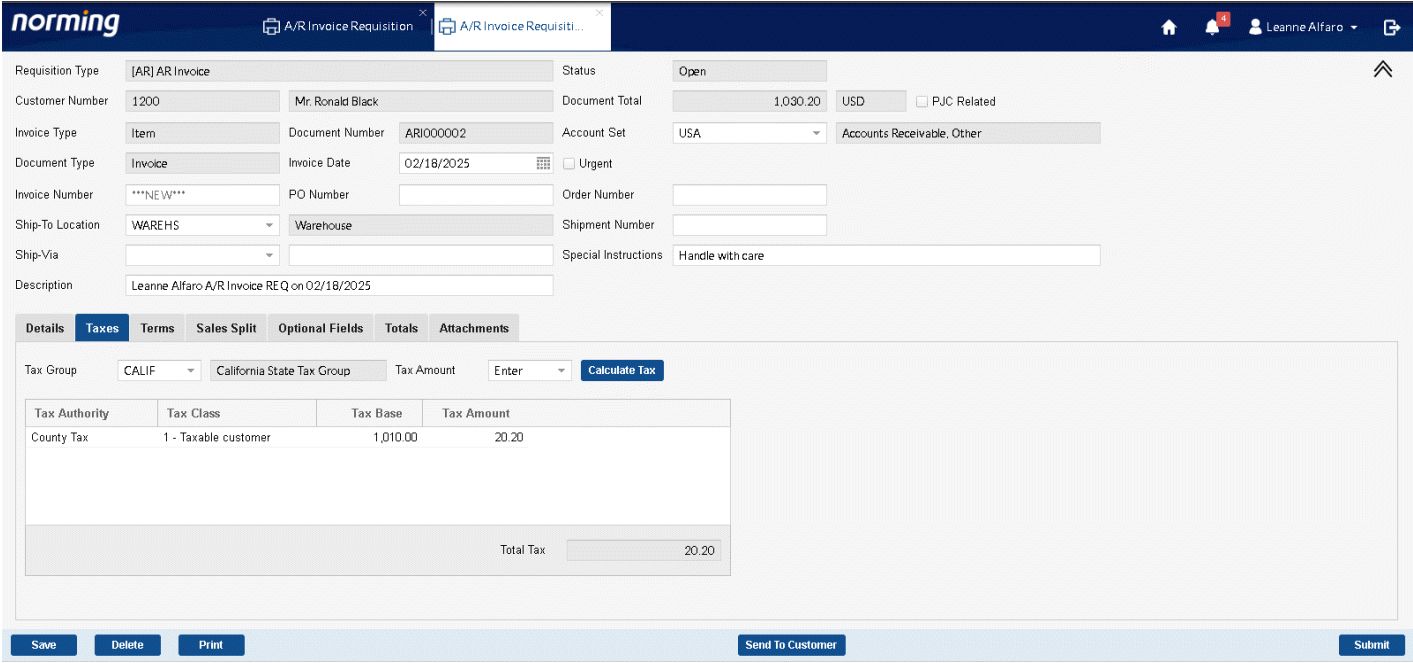
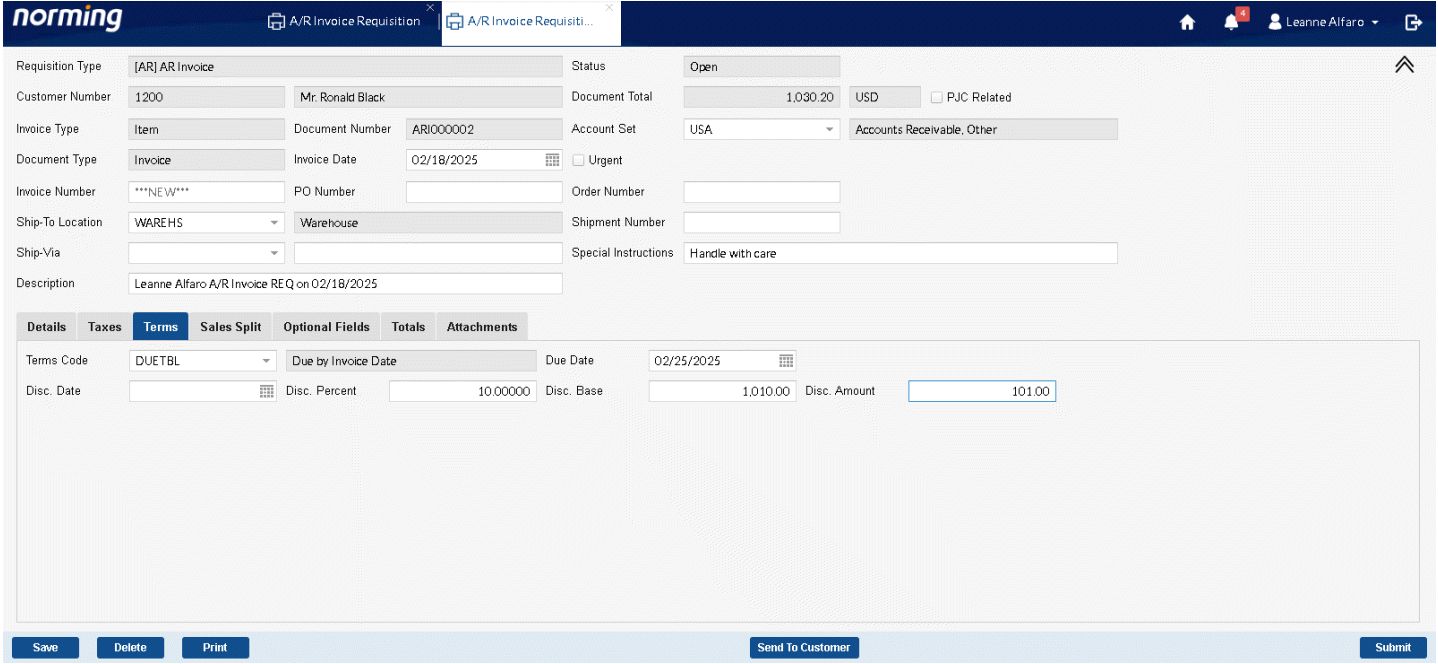
AR Invoice Requisitions Entry: 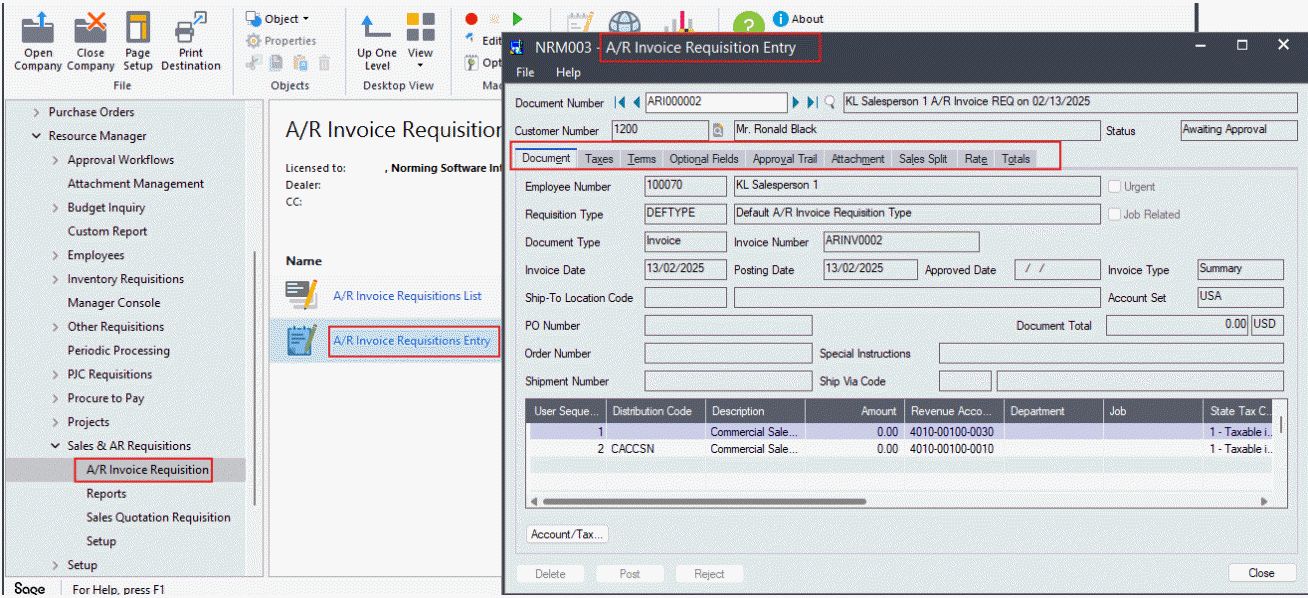
New Features
Sage 300 Integration
Resource Manager 2025 integrates with the following Sage 300 versions:
● Version 6.0 ● Version 2012
● Version 2014 ● Version 2016
● Version 2017 ● Version 2018
● Version 2019 ● Version 2020
● Version 2021 ● Version 2022
● Version 2023 ● Version 2024
● Version 2025
Purchase Requisition
'Func. Ext. Price' field is provided in the Quotation table for foreign Currency Vendor 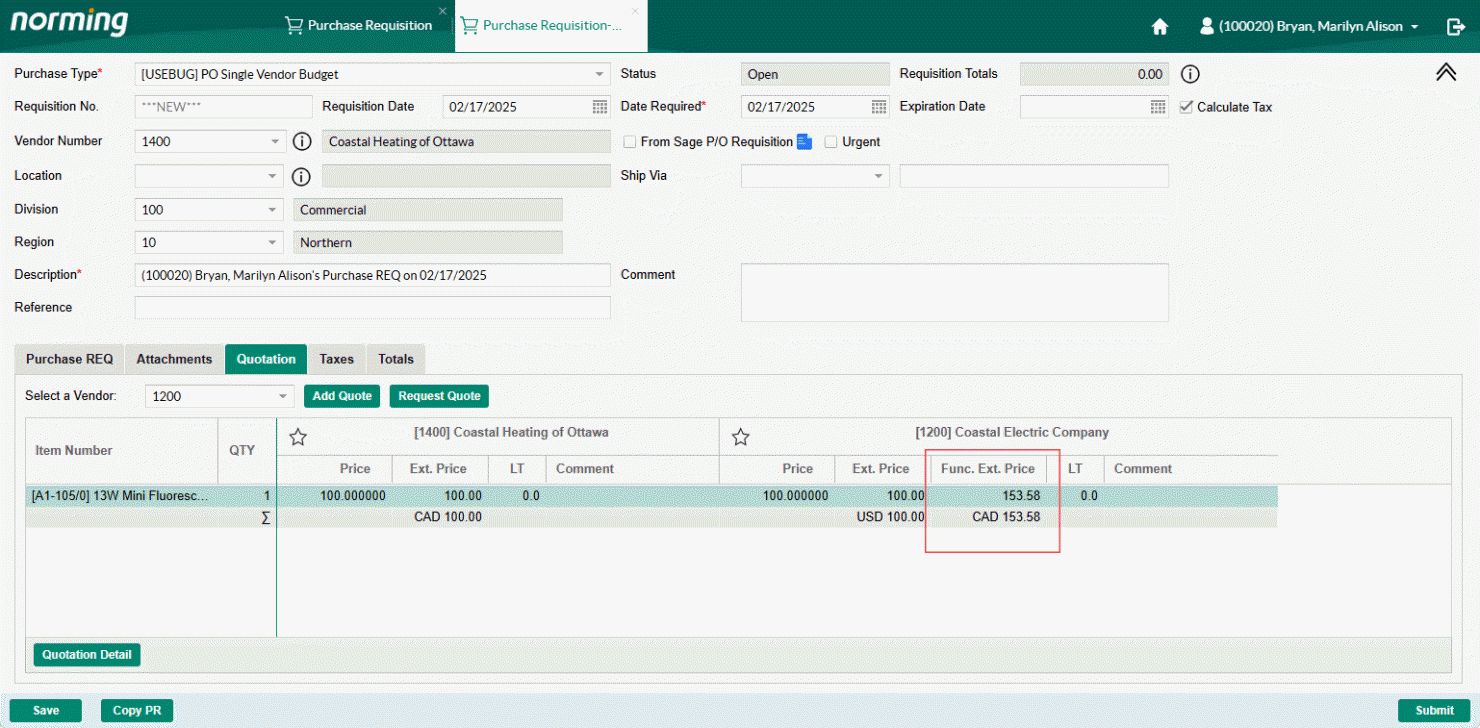
A/P Invoice Requisition
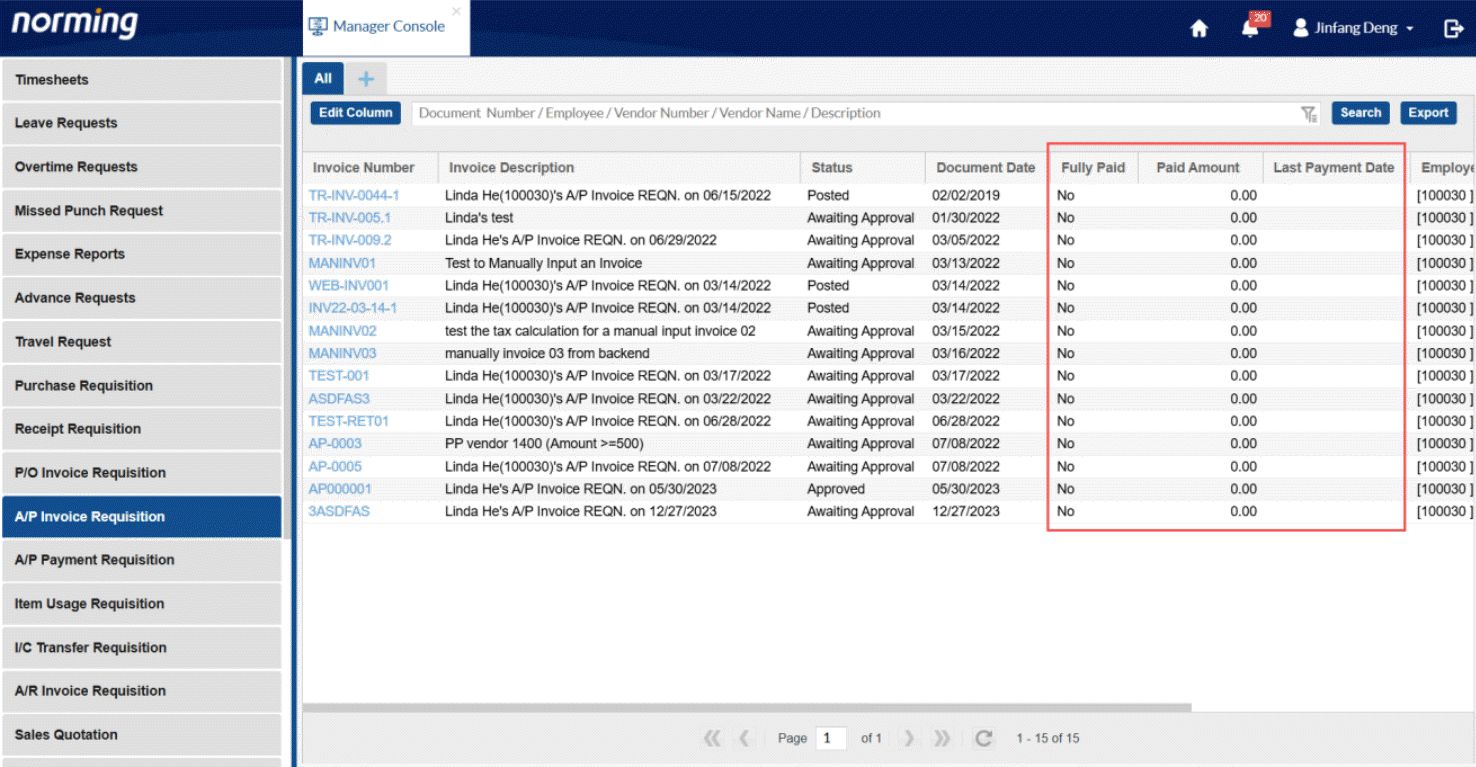
1. The following information can be displayed in the 'Manager Console':
Fully Paid, Paid Amount, Last Payment Date, Last Payment Check No. 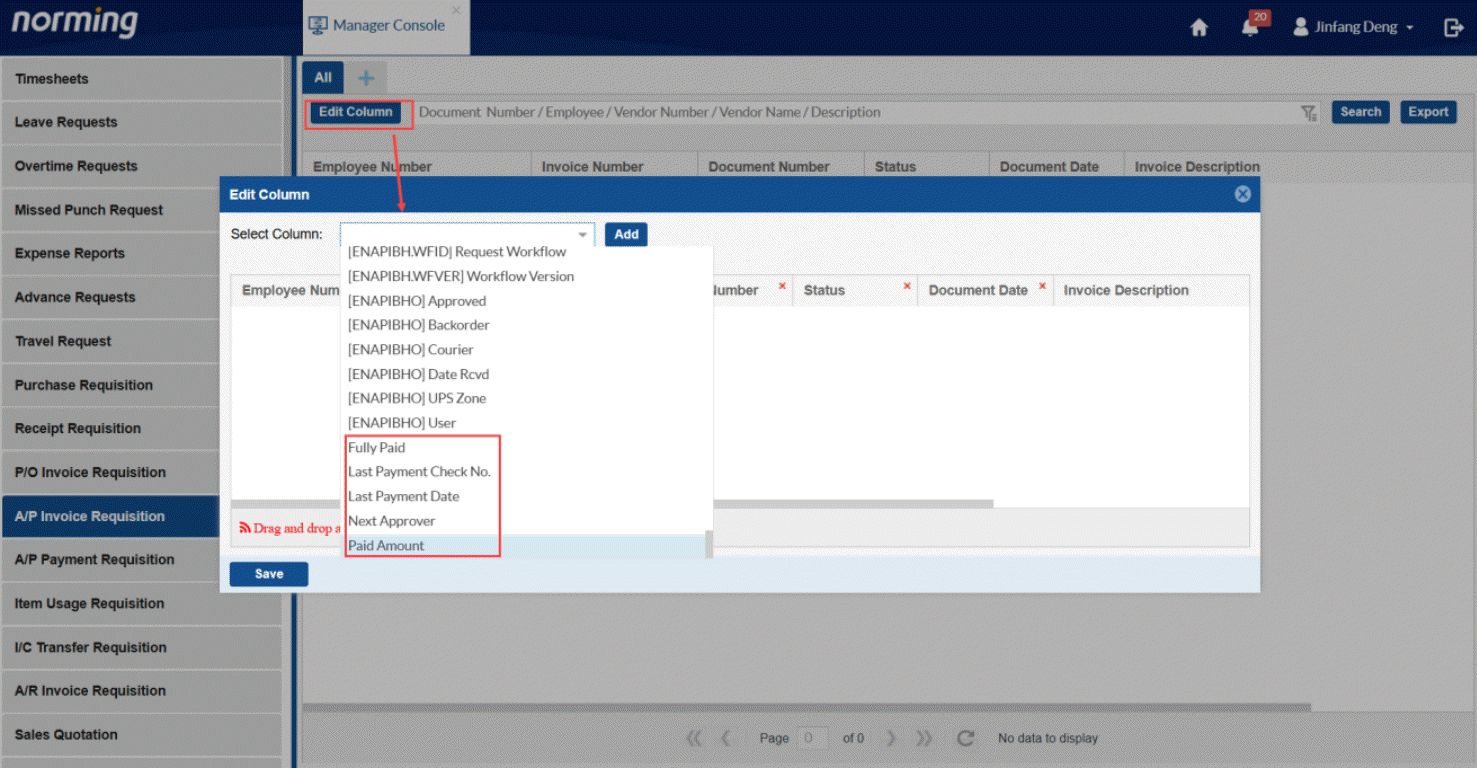
2. Drill-down ability is provided to PO Number/Order Number fields to display the original R/M Web Purchase Requisition/Sales Quotation. 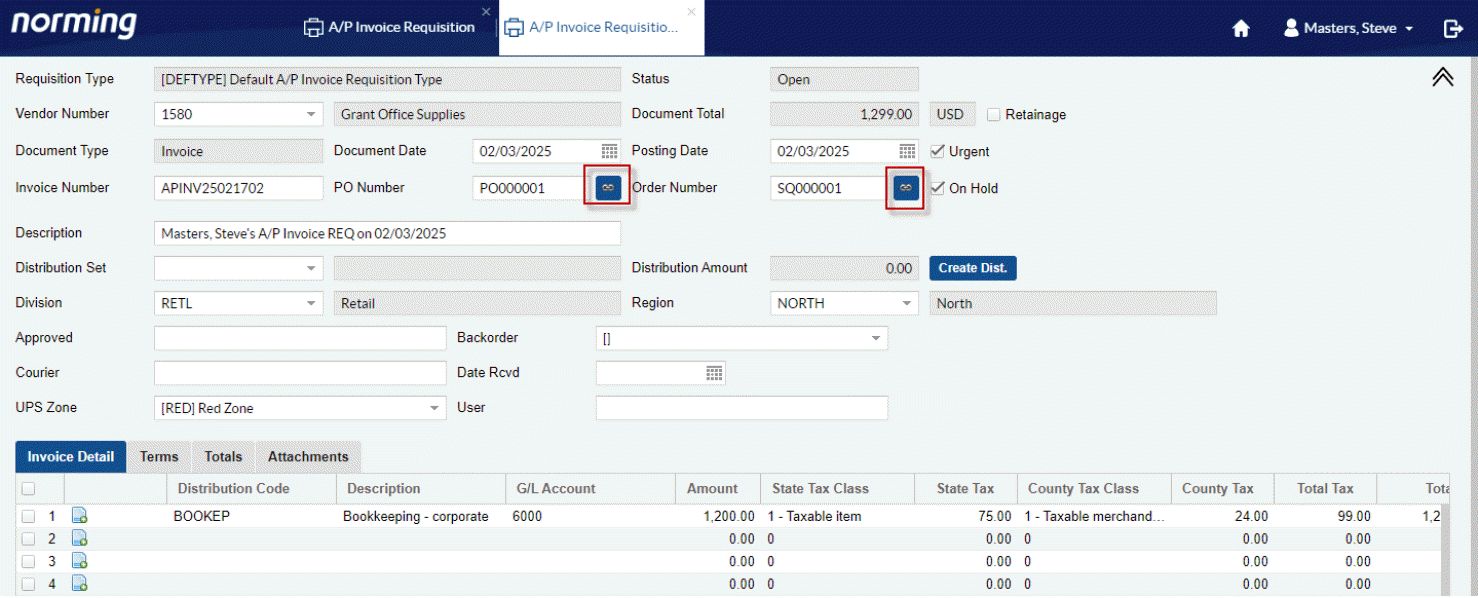
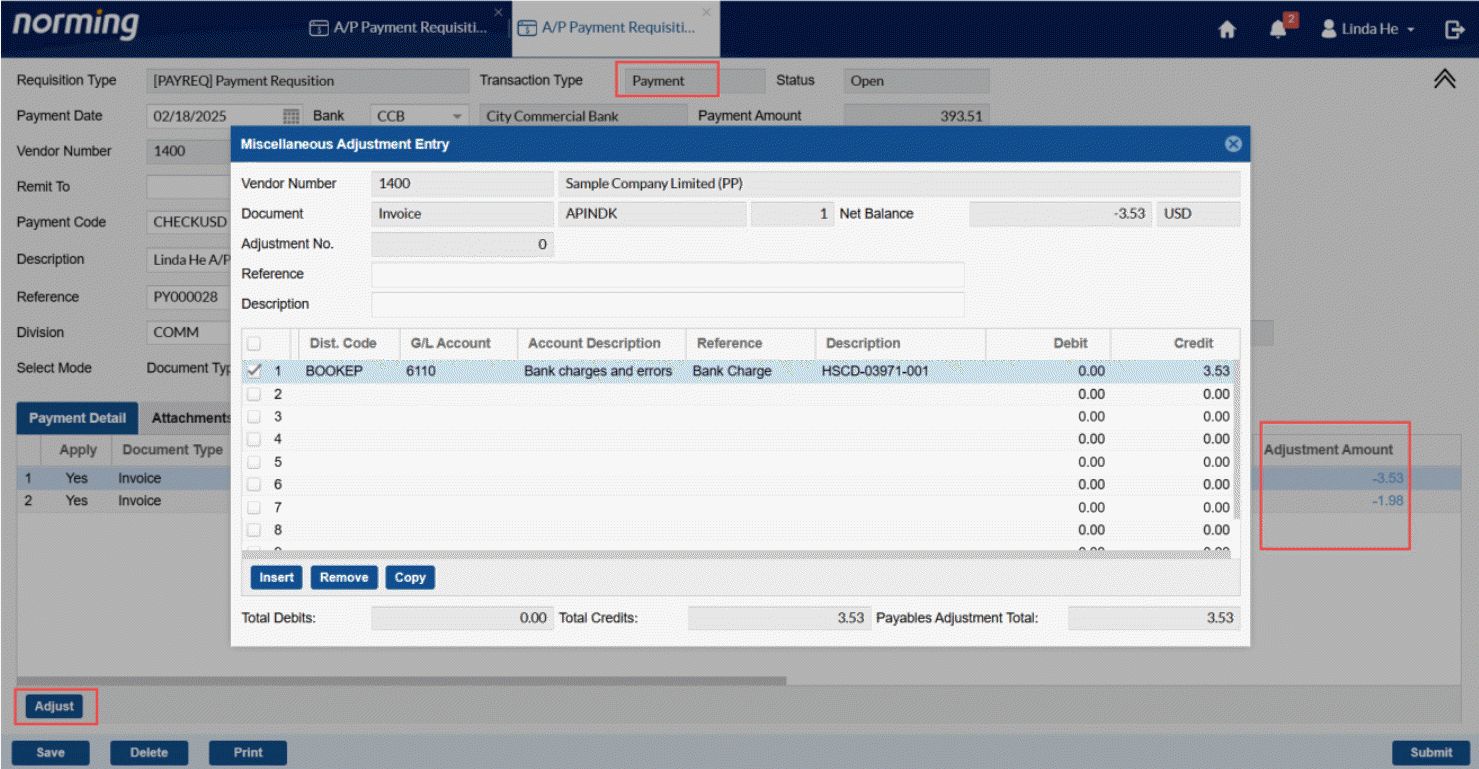
A/P Payment Requisition
Four new features are provided for A/P Payment Requisition
1. Provides the 'Adjust' ability to 'Payment' type payment requisitions. 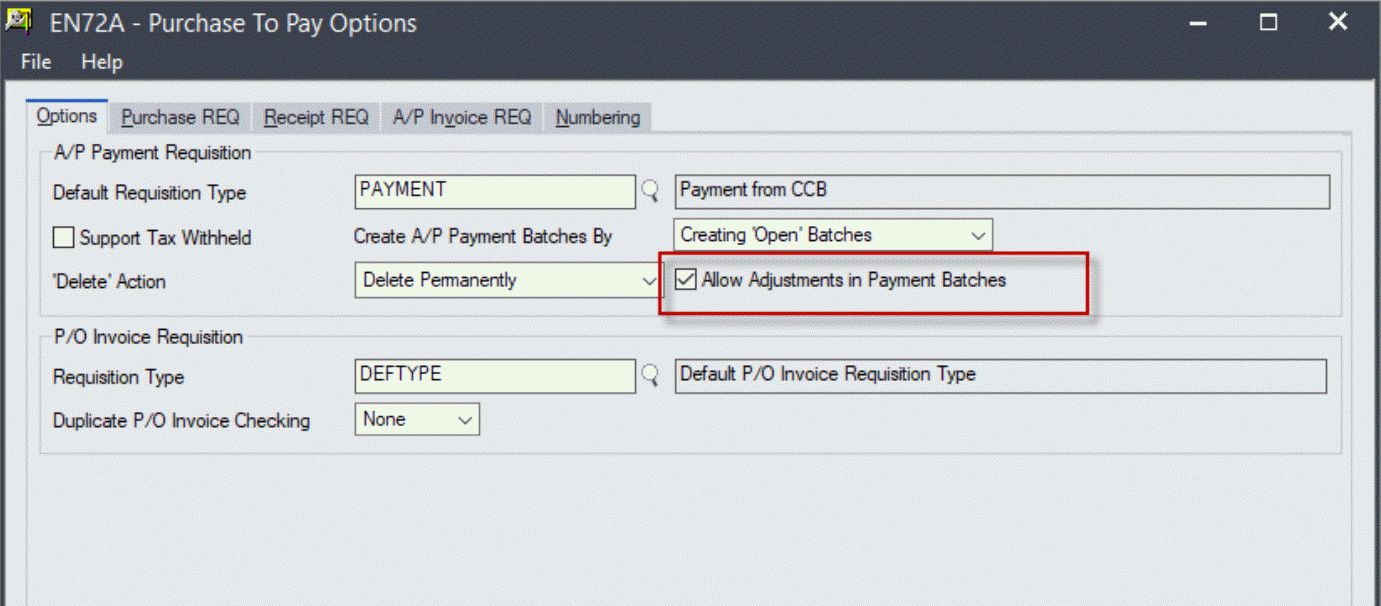
2. Two improvements made for 'Misc. Payment' type requisitions:
a. Allows to maintain Tax Included flag. 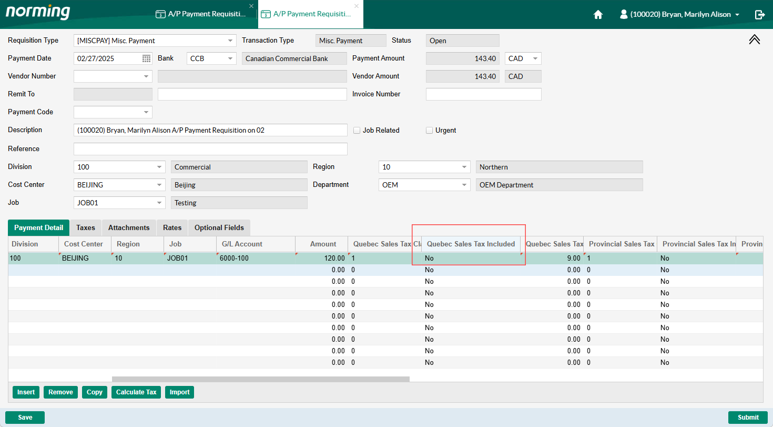
b. Provides the G/L Account override ability. 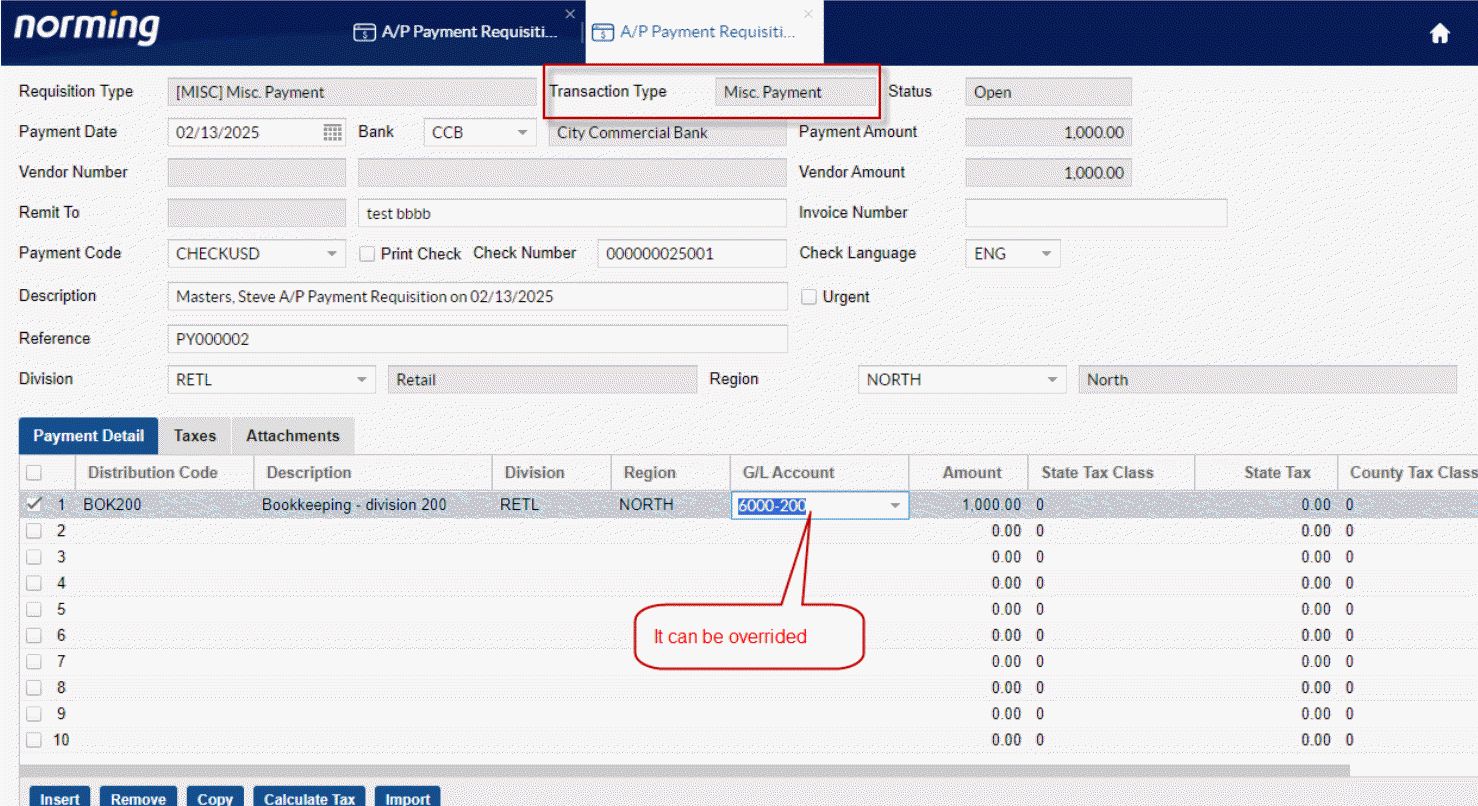
3. Display a 'Total Amount' for selected requisitions on the 'To Approve List'. 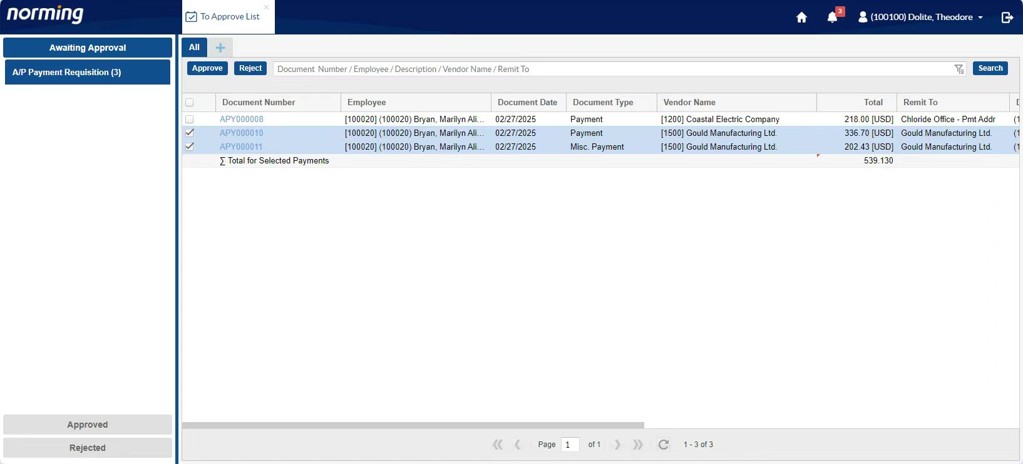
4. Drill-down ability is provided for Document Number/PO Number/Order Number fields, to drill down to the relative R/M Web requisitions. 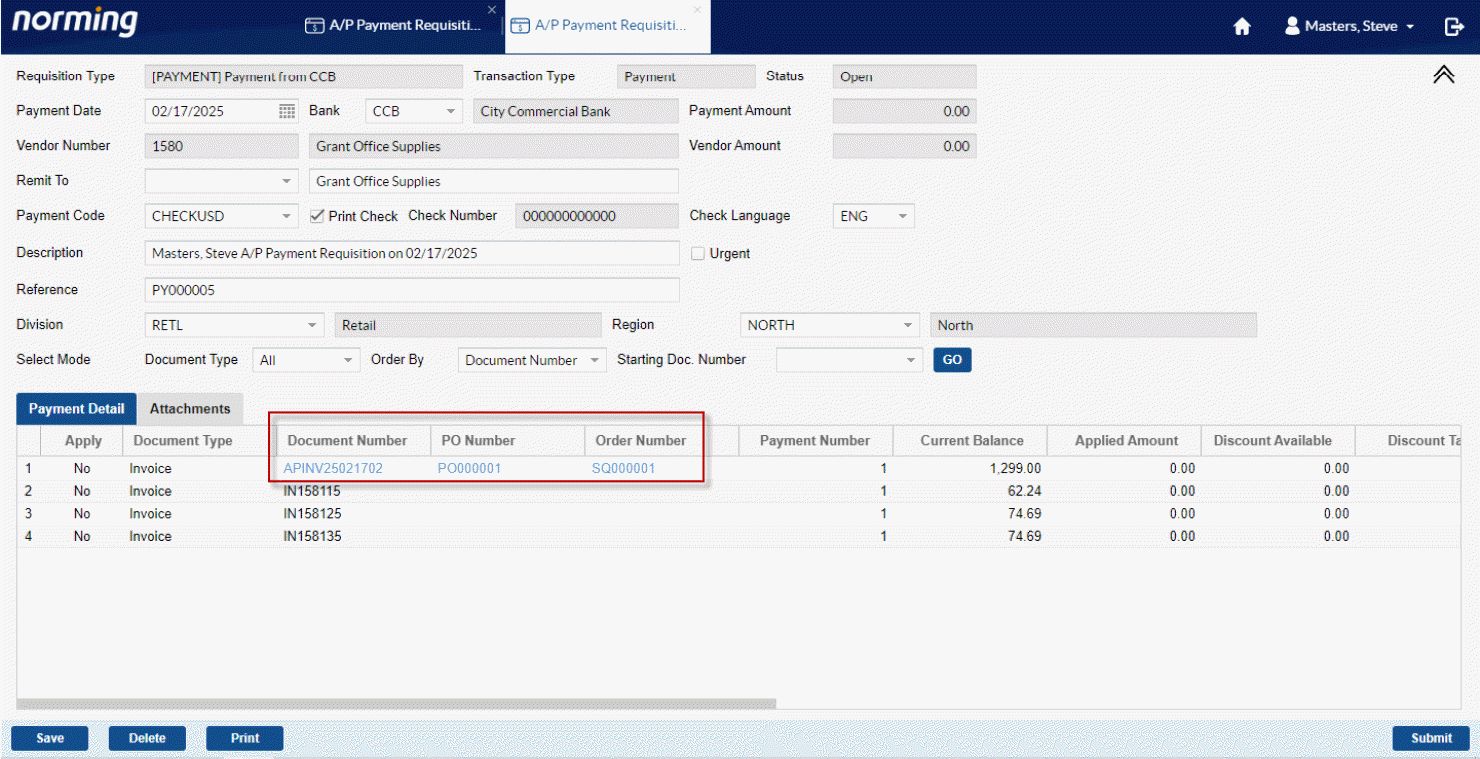
Sales Quotation
Provides the 'Quantity Committed' column in the Sales Quotation Detail table. 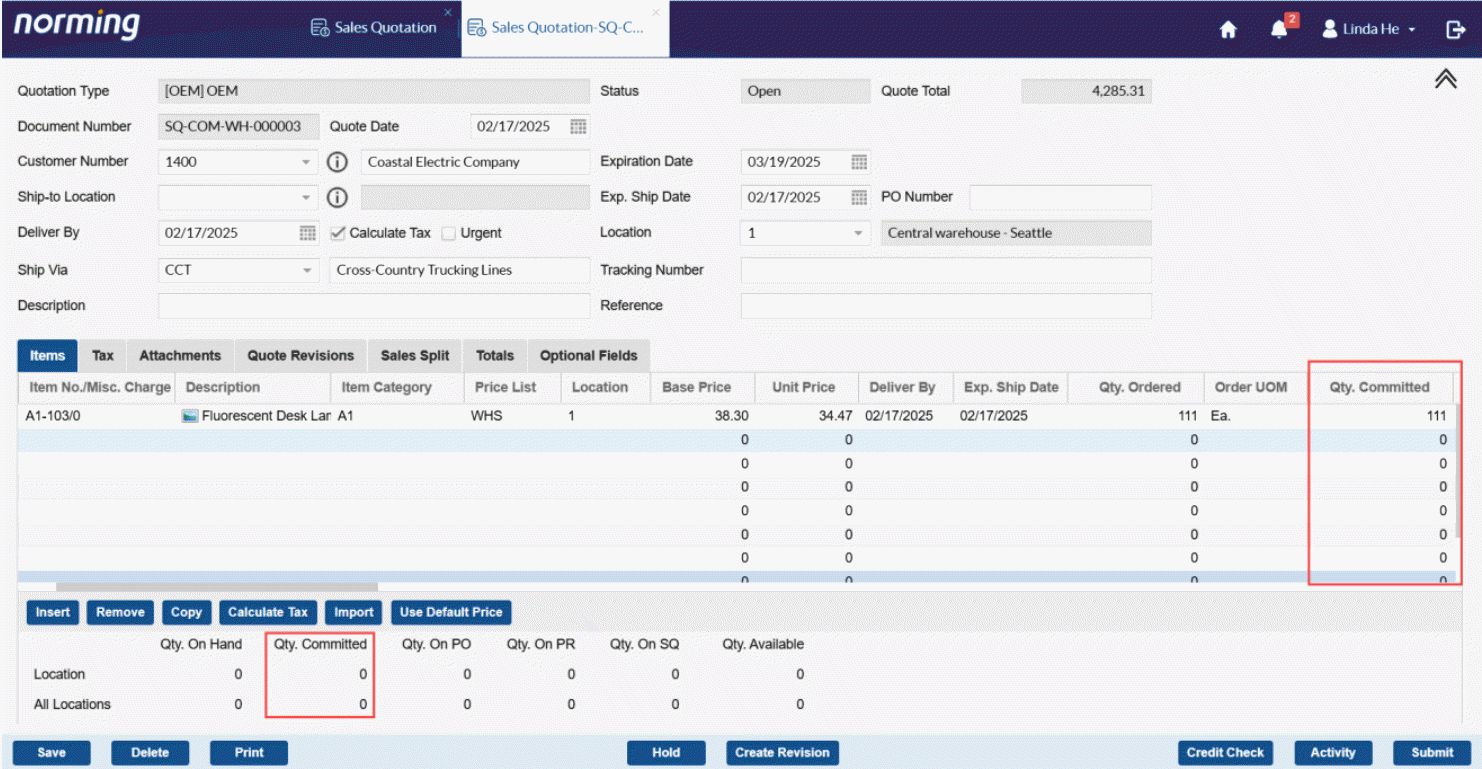
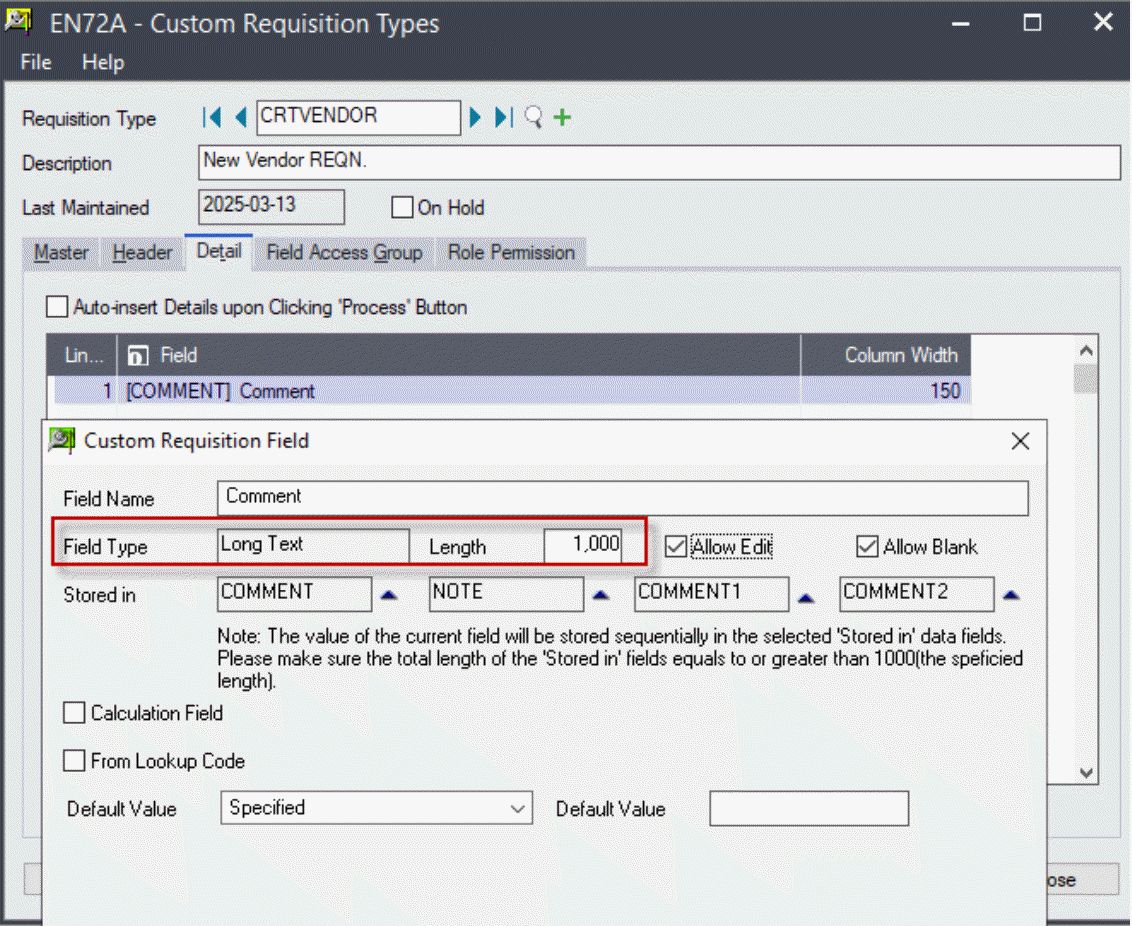
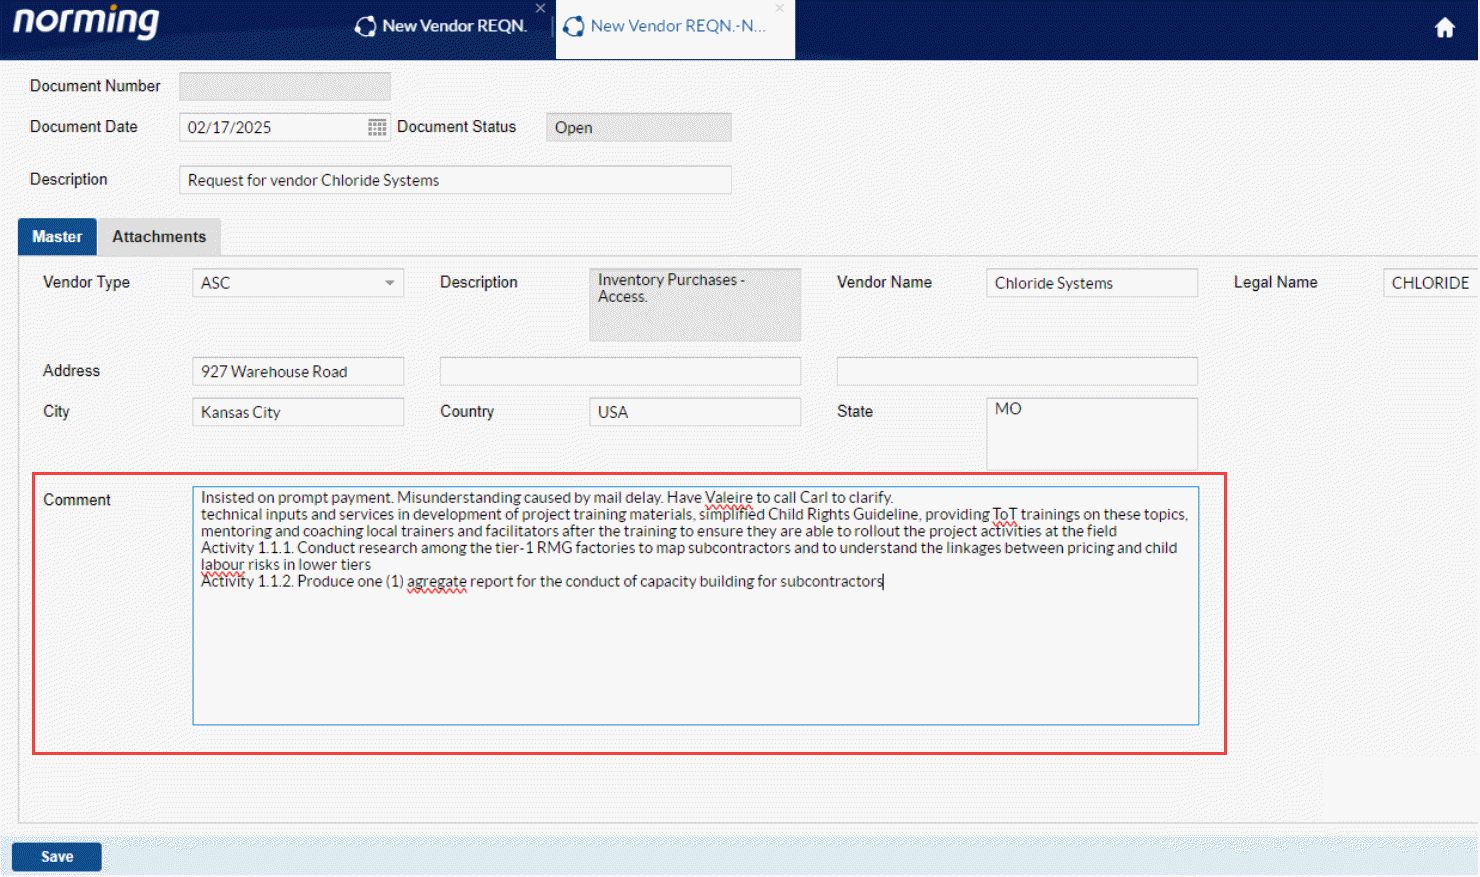
Custom Requisition
Supports long comment with up to 1000 characters, previously, only 250 characters are allowed.
Workflow
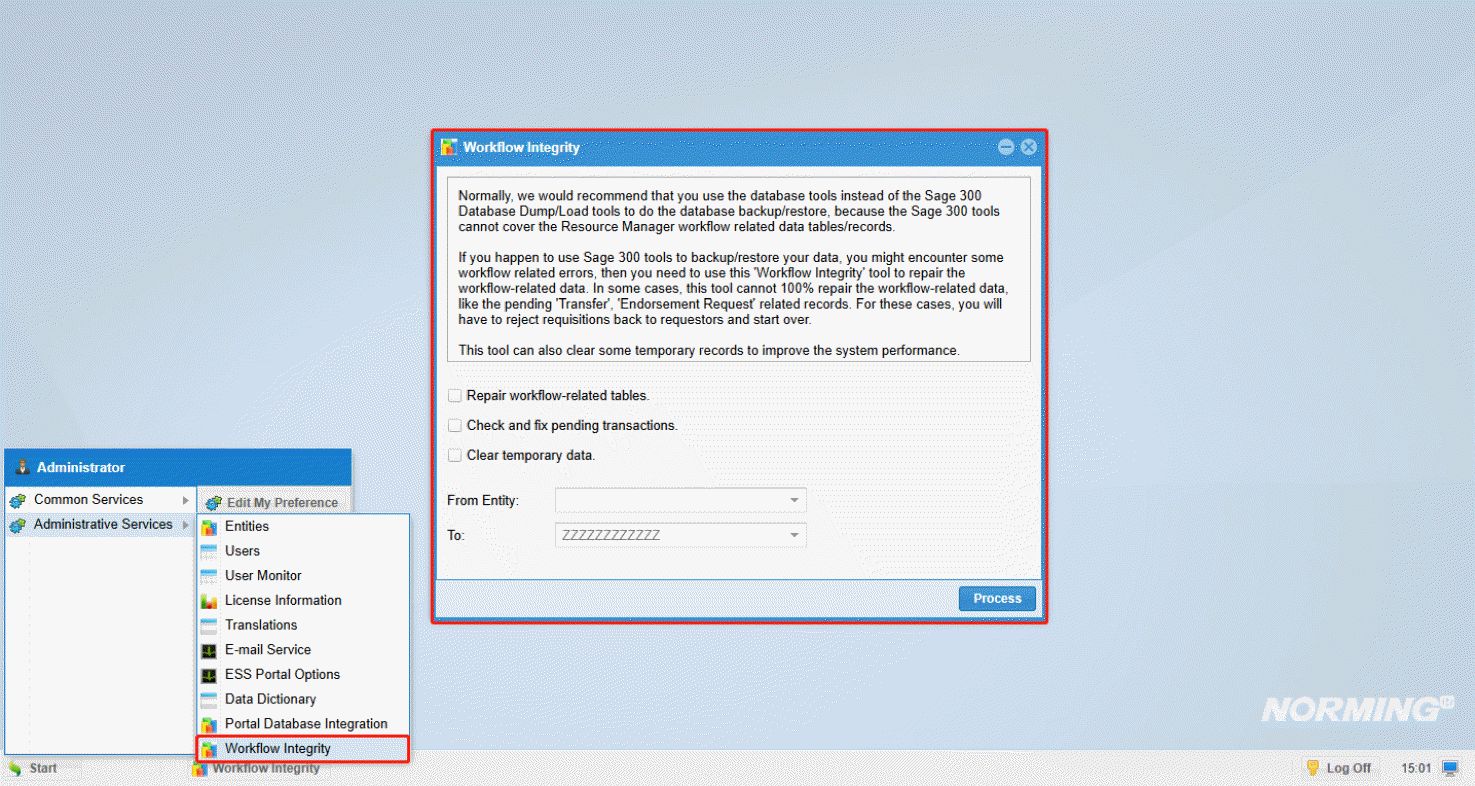
1. Normally, the Resource Manager workflow tables/records cannot be restored if you use the Sage 300 Database Dump/Load tools to do the database backup/restore. After a Sage 300 dump/load, you might encounter some workflow related errors, then you need to use the below 'Workflow Integrity' in the Admin Portal, to repair the workflow data.
In some cases, this tool cannot 100% repair the workflow-related data, like the pending 'Transfer', 'Endorsement Request' related records. For these cases, you will have to reject requisitions back to requestors and start over.
This tool can also be used to clear workflow temporary records to improve the system performance.
2. Improves the 'To Approve List' function to ensure all the validations can be properly processed.
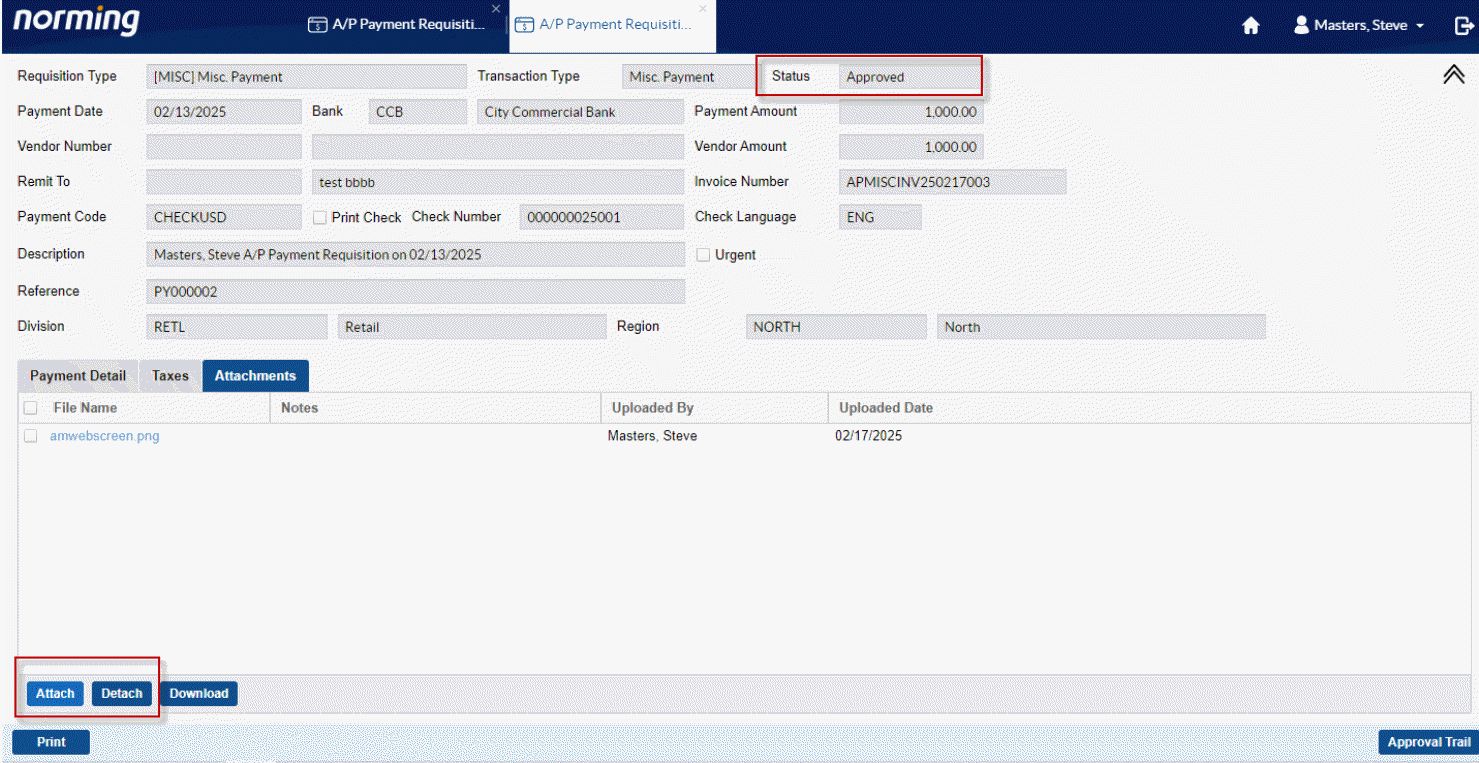
Upload Attachments for 'Approved' and 'Posted' Requisition
In previous versions, users can maintain attachment only for ‘Open’ and ‘Awaiting Approval’ Requisitions, while this new feature allows user to upload/remove attachments for the following requisitions with a status of ‘Approved’ or ‘Posted’:
● AP Payment Requisition
● PO Receipt Requisition
● PO Invoice Requisition
● Sales Quotation
● A/R Invoice Requisition
To enable this feature, the 1st step is to assign the permission of uploading/removing attachments for ‘Approved’ and ’Posted’ requisition to ESS users through the ESS Group or ESS User in the Admin Portal.
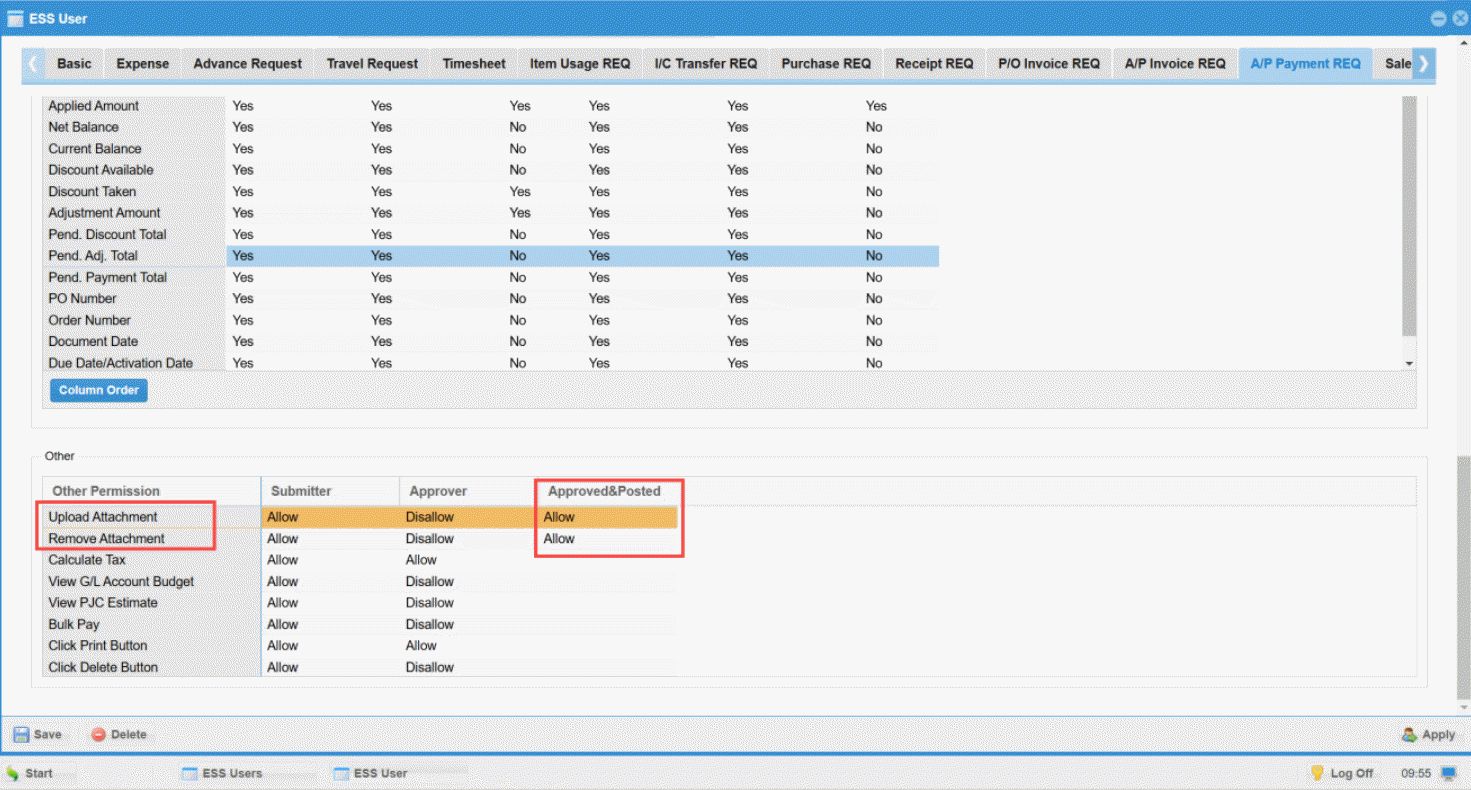
Then ESS users are able to upload or remove attachments for ‘Approved’ or ‘Posted’ requisitions mentioned above.
OCR Tasks
Provides the 'To-confirm Invoices' tab to only list the to-confirm invoices. 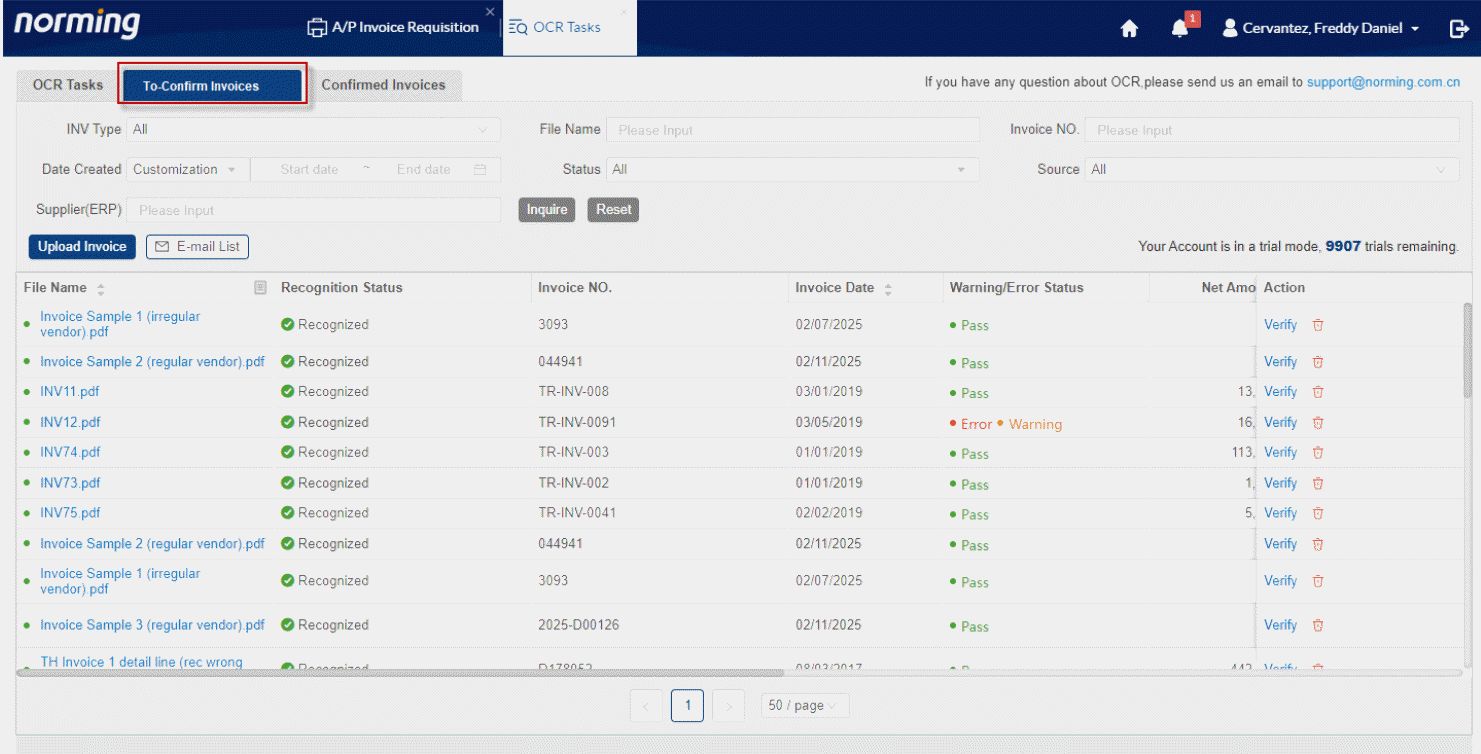
Mobile App
Provides the approval ability for A/R Invoice Requisition.
Web Screen
Provides web screen for A/R Invoice Requisition List.